CORS is a requirement for cross domain XHR calls, and when you use Angular 2.0 default dev server and talk to an ASP.NET Core application you'll need to use CORS to get XHR to talk across the domain boundaries. Here's how to set up CORS and how to test it.![]()
![]()
![]()
![]()
![]()
![]()
![]()
↧
ASP.NET Core and CORS Gotchas
↧
External Network Access to Kestrel and IIS Express in ASP.NET Core
Recently I needed to connect to my Windows based ASP.NET Core API from my Mac and in order for that to work some configuration settings are necesary so that the ASP.NET applications can serve HTTP content to the external network connection that this entails. In this post I show what you have to do to enable remote connections both using the Kestrel and IIS Express Web servers.![]()
![]()
![]()
![]()
![]()
![]()
![]()
↧
↧
Dealing with Anti-Virus False Positives

I've been working on Markdown Monster for a while now. It's a standalone desktop application and in recent months I've been plagued with Anti-Virus false positives for the installation executable. I didn't realize anything was wrong at first, until a few occasional emails came rolling in from users telling me their anti-virus flagged the installer - in many cases completely blocking the install process.
My first reaction was - "ah, just a fluke with a false positive". After all I know what's in my code and there's nothing threatening in here. But to my chagrin, using VirusTotal - which is used by Chocolatey and other distribution sources - I was coming away with 9 AV failures:

Looks nasty doesn't it? I had to take a closer look.
Figuring out what's going on
Anti-Virus false positives are a pain because it's quite likely if you open the package and see a virus warning you're going to be very hesitant to go any further, my assurances aside :-) Several people contacted me in recent weeks and let me know that the installer was flagged by their Anti-Virus tool. A few were brave and installed anyway - saying they trusted me that there was no malice in these files since they are coming from me. Brave indeed - I'm not sure I'd do the same. Seeing AV warnings on software is something you generally want to take serious.
In this case however, it turns out that it's definitely a case of false positives. How do I know this?
Well, let me tell you a story...
As it turns out there were a number of factors at play here:
- One third party library that had been flagged as malicious
- One installer platform apparently tagged
In order to track down the problem I tried a boatload of things to try and isolate where the problem was coming from. It took a while but I think I'm out of the woods for now. In this post I walk through the morass of trying to figure out what was causing the false positives and the workarounds that eventually allowed me to get past the problem - after quite a bit of sleuthing and wasted time. I figure it might be useful you find yourself in a similar position with your application...
Third Party Problem
I started by removing all DLL dependencies from the installed distribution before compiling into the installer. To my surprise, after removing all dependencies VirusTotal came down to 3 AV hits, instead of the previous 9 I started with - a definite improvement.
It turns out that one third party library - hunspell spell checker library specifically - has had a problem with a very particular version. Doing some research I found that another vendor had built a custom version of hunspell.dll that did some monkey business - and that's what got hunspell flagged as a potential trojan. Removing hunspell immediately dropped a number of the AV hits (down to 3 from 9).
I played around with several different versions of hunspell and found that only the latest version of NHUnspell was flagging AV. I uninstalled and installed an older version and AV no longer flagged those particular items.
I suspect this is also a false positive. After all hunspell is open source and quite popular as it it's used by major pieces of software like most browsers and most open source editors. It's also open source so the code is there for all to see - it'd be hard to hide a trojan in broad view especially in tool with such tightly defined scope and size. But... nevertheless it got flagged and the only way for me to get past this was to use an older version.
Which is ridiculous if you think about it!
Installer Woes
This still left me with 3 AV hits one of which was a major vendor - Avast.
At this point I wasn't sure what to try. I had removed all external binaries, and I was still getting errors.
I then zipped up all code without using the installer software (InstallMate is what I use) - IOW, I just packaged up the entire distribution folder minus Installer package that provides the shortcut, registry keys (for IE version and file association) and Environment (adding to path) registration. And lo and behold - no AV hits.
I then built an empty installer - nothing in it except all the text and image resources - also no AV hits. I then added back the DLLs - no AV hits. Added back my main EXE - and BAM! - back to having AV troubles.
I then also tried just checking the main EXE on its own on VirusTotal and that comes away clean with 0 AV hits as well.
MADNESS!
In summary - on its own the Exe is fine. On its own the installer minus EXE is fine. The full distribution zipped up plain without the installer is also fine. All fine, but the combination of installer plus my EXE results in multiple AV hits.
Yup that makes perfect sense. NOT!
This really makes you wonder how much faith you should have in these anti-virus solutions. If the individual parts are clean but the combined parts trigger, something is seriously amiss in the detection process. Further if you look at the original screen shot of the AV hits, every vendor seems to be triggering on a completely different threat. Again how should this be possible if individually the files are fine, but packaged they are not? How reliable is this stuff really?
Rebuilding the Installer
At this point the only solution I have left to me is to rebuild the installer.
I've used Tarma's Installmate for years and years. It's been easy to work with, very reliable and with all my other products I never had an AV problem. In this case though clearly some magic combination is triggered that sets of AV alarms and I was just not able to shake it.
So - I created a new installer using Inno Setup which is a very popular and free solution. My install is fairly straight forward in that it copies a fixed file structure and just needs a couple of registry entries, an environment setting and a file association, so it was relatively painless to build a new installer that duplicates what I had with InstallMate. The hardest part was re-creating the installer images in the right format :-)
After building the final install I sent it off to VirusTotal and... it came back clean - no AV hits:

Yay!
Now here's the scary part - I've sent up the file several times and had the very same file reanlysed a few times. 2 out of 5 times it came up with one AV hit (for some obscure Chinese AV software). But again - that makes you wonder how reliable all of this AV testing is when several consecutive runs of the same exact file produce different results?
Signing the Installer and Main Executable
While I was fretting about the fact that this software was probably not getting used at all due to the AV issues, I also decided it's probably a good idea to have the installer and the main Exe signed to prove the identity where it comes from. This is probably doubly important since the code for Markdown Monster is available and it's possible to recompile the application. The Sign Code signature clearly identifies the official version that is published by West Wind Technologies.
I've put off signing my software for a long time, because it's quite the hassle to aquire a certificate, get it installed properly, sign your code and then make sure the certificate is renewed each year. I found out that prices for these Code Signing certs have come down somewhat since I last checked. I ended up with a Commodo Certificate from the SSL Store. And true to form the first certificate that was issued didn't want to properly install into the Windows certificate store. I was unable to export it or otherwise reference it. I had to have it re-issued, but not after wasting an hour trying to get it to work. When the new certificate arrived it 'just' worked.
Security on Windows is always a hassle because it's so bloody unclear on where certificates need to live so that applications that need it can find it.
Here are a few hints about Code Signing an Exe:
- Use the same browser to generate and then install the certificate
- FireFox worked best for me - it allowed easy export of the Certificate
- Chrome and IE installed the cert in the wrong place and I couldn't export to PFX
- FireFox could export to PKCS#12 which is the same as PFX format
- I had to install the certificate to Local Machine/Person to get it to work
- Signtool was not able to find the cert when installed in Current User/Personal
- Use SignTool.exe to sign using Installed Certificate (rather than PFX)
- Run SignTool as Admin (when cert is installed in Local Machine)
To actually sign a certificate I use the following in my Powershell build script:
& "C:\Program Files (x86)\Microsoft SDKs\Windows\v7.1A\Bin\signtool.exe"
    sign /v /n "West Wind Technologies"
    /sm /s MY
    /tr "http://timestamp.digicert.com" /td SHA256 /fd SHA256".\Builds\CurrentRelease\MarkdownMonsterSetup.exe"
The /n "West Wind Technologies" switch specifies a substring of the Certificate's subject item which includes CN=West Wind Technologies so that works. The /sm switch uses the machine level certificate which was the only way I could get it to work. I also had to run as an Administrator in order to get at that certificate.
For me this only worked with the certificate installed in the Local Machine store, not the current user and having to run as an Administrator. I couldn't get SignTool to work with the Current User/Personal installed certificate and running without the /sm switch - when running as a regular user I always get the message that SignTool can't locate an appropriate certificate. There probably is a way to make this work with current user but I couldn't find the right incantation. If you know how to sign without running as an Admin (and using the certificate store rather than the PFX with a password) please drop a comment.
So when you fire up the unsigned installer it looks like this:

After signing the setup EXE and running the signed installer it goes to a the much less scary looking dialog:

with the MM icon and the West Wind publisher name applied.
While this ended up not having any effect AV hits, it does provide more confidence for people downloading the software.
So now I have a clean AV slate (for now - fingers crossed) and a properly signed Exe which is nice. But man a lot of effort went into making this all happen.
Now to go and sign all the rest of my products properly as well.
Anti-Virus Hell
At the end of the day, this was a major pain in the ass, when essentially it came down to false positive AV scores. But, there's really nothing I could do other than try to work around the issues I mentioned in the end having to completely ditch my perfectly fine installer software for an alternative, just to get a different result. Nothing has changed - the same binaries are deployed as before, the same installation changes are made - one solution flags AV, the other does not. And that is just not cool and leads me to think that much of the AV tracking is not as sophisticated as we'd expect it to be.
To be fair most AV vendors have Web sites to submit false positives and the three I submitted to were responsive to rescanning (and ultimately stating there's nothing wrong with files). But that's not a sustainable solution if you push out new builds that are likely to trigger again in the future.
This is a pain for software vendors to say the least. I'm at the mercy of the AV software that is essentially holding software hostage based on false positives. Nobody wants to install software that is flagged as malware - even if you trust the source.
While searching around and Twittering about the issues I ran into, I got an earful from other developers who've gone through similar pains.
Markdown Monster
If you previously tried to use Markdown Monster and ran into Anti-Virus warnings, you might want to give it another try. Starting with Version 0.51 the new installer and signed code is live.
© Rick Strahl, West Wind Technologies, 2005-2016
↧
Error Handling and ExceptionFilter Dependency Injection for ASP.NET Core APIs

While working on my ASP.NET Core API and Angular 2.0 AlbumViewer sample, one last thing I need to round out the feature set is to make sure that consistent error results are returned to the client. Unhandled errors should also be logged to disk for later reference.
ASP.NET Core does not provide a consistent error response for API errors out of the box. In fact, an error in an API results in the same error result as any other type controller result - an HTML error page (which you can configure) or nothing at all if you don't hook up any error handling middleware. For API's this is generally useless - a client application expecting a JSON result is not going to be able to do anything useful with an HTML error page, so some extra work implementing an ExceptionFilter is required. Actually there are a several ways you can implement error handling but ExceptionFilters are amongst the easiest and most flexible to implement. Other alternatives might include custom middleware but I won't cover that in this post.
ASP.NET Core also does not include a built-in file logging service so I have to rely on the excellent 3rd Party Serilog library to provide file logging for me. Additionally getting a logging dependency into a filter via Dependency Injection requires a little extra work.
In this post I describe how to create an ExceptionFilter to create consistent API error responses and use a Dependency Injected logging provider. In the process I'll talk a bit about error handling in my API implementation.
API Error Handling - A Use Case for an ExceptionFilter
In my AlbumViewer API I capture all errors using an MVC ExceptionFilter. As you might remember from previous posts, in ASP.NET Core MVC and APIs share a common processing pipeline so any filters you create can be used by both MVC and API controllers. In this case the controller will be specific to API results.
Inside of my API code any unhandled Exception should trigger the ExceptionFilter, which then captures the exception and in response returns a JSON error response in the form of a standard error object. The idea is that any error I can possibly intercept will be returned as a JSON response so that the client can provide some meaningful error information. The object returned always has a .message property that can that can potentially be used to display error information in a front end.
To start with, here is my initial error filter implementation without any logging:
public class ApiExceptionFilter : ExceptionFilterAttribute
{
    public override void OnException(ExceptionContext context)
    {
        ApiError apiError = null;
        if (context.Exception is ApiException)
        {
            // handle explicit 'known' API errors
            var ex = context.Exception as ApiException;
            context.Exception = null;
            apiError = new ApiError(ex.Message);
            apiError.errors = ex.Errors;

            context.HttpContext.Response.StatusCode = ex.StatusCode;
        }
        else if (context.Exception is UnauthorizedAccessException)
        {
            apiError = new ApiError("Unauthorized Access");
            context.HttpContext.Response.StatusCode = 401;
            // handle logging here
        }
        else
        {
            // Unhandled errors
            #if !DEBUG
                var msg = "An unhandled error occurred.";
                string stack = null;
            #else
                var msg = context.Exception.GetBaseException().Message;
                string stack = context.Exception.StackTrace;
            #endif

            apiError = new ApiError(msg);
            apiError.detail = stack;

            context.HttpContext.Response.StatusCode = 500;

            // handle logging here
        }

        // always return a JSON result
        context.Result = new JsonResult(apiError);

        base.OnException(context);
    }
}
The exception filter differentiates between several different exception types. First it looks at a custom ApiException type, which is a special application generated Exception that can be used to send user acceptable error messages to the client. I use these in my controllers for handled errors that I want to use to display in the front end. Typically these are validation errors, or known failures like a login failure.
Next are unauthorized execptions which are handled specially by returning a forced 401 exception which can be used on the client to force authentication. The client can check for 401 errors and redirect to the login page. Note that ApiError results can also generate 401 responses (such as on a login error for example).
Finally there are unhandled exceptions - these are unexpected failures that the application doesn't explicitly know about. This could be a hardware failure, a null reference exception, an unexpected parsing error or - horror of horrors - a good old developer introduced bug. Basically anything that's - unhandled. These errors generate a generic error message in production so that no sensitive data is returned. Or at debug time it can optionally return the error message and stack trace to provide debugging information.
In all the use cases the exception filter returns an API error object as a response:
context.Result = new JsonResult(apiError);
base.OnException(context);
which triggers the custom response that always ensures an object result with a .message property to the client.
Displaying Default Error Results
As an alternative - if you want to see the developer error page on unhandled exceptions - you can also exit without setting the
context.Resultvalue which triggers whatever the default error behavior was. If you want the default behavior for one or another of the use cases just return. For example for unhandled exceptions I could do:context.HttpContext.Response.StatusCode = 500; #if DEBUG return // early exit - result not set #ENDIF
Note that the filter implementation uses a couple support types:
ApiException
A custom exception that used to throw explicit, application generated errors that can be funnelled back into the UI and used there. These typically are used for validation errors or common operations that can have known negative responses such as a failed login attempt. The idea is that this error is used to return a well defined error message that is safe to be used on the client.ApiError
A custom serialization type used to return the error information via JSON to the client. Exceptions are not good for serialization because of the sensitive data and complex structure, so a simpler type is needed for serialization. The key property is.messagethat contains a message that is always set - even if it is a non-descript message in the case of unhandled exception. The type also has a.detailproperty that can contain additional information and a collection of.errorsthat can return a set of errors such as a list of validation errors to the client.
The two classes are implemented like this:
public class ApiException : Exception
{
    public int StatusCode { get; set; }

    public ValidationErrorCollection Errors { get; set; }

    public ApiException(string message,
                        int statusCode = 500,
                        ValidationErrorCollection errors = null) :
        base(message)
    {
        StatusCode = statusCode;
        Errors = errors;
    }
    public ApiException(Exception ex, int statusCode = 500) : base(ex.Message)
    {
        StatusCode = statusCode;
    }
}

public class ApiError
{
    public string message { get; set; }
    public bool isError { get; set; }
    public string detail { get; set; }
    public ValidationErrorCollection errors { get; set; }

	public ApiError(string message)
    {
        this.message = message;
        isError = true;
    }

    public ApiError(ModelStateDictionary modelState)
    {
        this.isError = true;
        if (modelState != null && modelState.Any(m => m.Value.Errors.Count > 0))
        {
            message = "Please correct the specified errors and try again.";
            //errors = modelState.SelectMany(m => m.Value.Errors).ToDictionary(m => m.Key, m=> m.ErrorMessage);
            //errors = modelState.SelectMany(m => m.Value.Errors.Select( me => new KeyValuePair<string,string>( m.Key,me.ErrorMessage) ));
            //errors = modelState.SelectMany(m => m.Value.Errors.Select(me => new ModelError { FieldName = m.Key, ErrorMessage = me.ErrorMessage }));
        }
    }
}
Using the Exception Filter
To use the Exception Filter I can now simply attach it to my controllers like this:
[ApiExceptionFilter]
[EnableCors("CorsPolicy")]
public class AlbumViewerApiController : Controller
Or you can globally add it like this:
services.AddMvc(options =>
{
    options.Filters.Add(new ApiExceptionFilter());
})
We can now try this out in a controller method like this for simulating an unhandled exception:
[HttpGet]
[Route("api/throw")]
public object Throw()
{
    throw new InvalidOperationException("This is an unhandled exception");
}
and we should end up with a result like this when in debug mode:
{
    message: "This is an unhandled exception",
    isError: true,
    detail: " at AlbumViewerAspNetCore.AlbumViewerApiController.Throw() in
    C:\...\AlbumViewerApiController.cs:line 53 at
    Microsoft.AspNetCore.Mvc.Internal.ControllerActionInvoker.<InvokeActionFilterAsync>d__28.MoveNext()",
    errors: null
}
and like this in non-debug mode:
{
    message: "An unhandled error occurred.",
    isError: true,
    detail: null,
    errors: null
}
Consistent Errors on the Client
A client application can now make some assumptions around the error it receives. For example in my Angular 2.0 client application I use a custom response error parser that explicitly checks for objects with a message property and if it finds one uses it or else creates one as part of the Observable http call:
parseObservableResponseError(response) {
    if (response.hasOwnProperty("message"))
      return Observable.throw(response);
    if (response.hasOwnProperty("Message")) {
      response.message = response.Message;
      return Observable.throw(response);
    }
    // always create an error object
    let err = new ErrorInfo();
    err.response = response;
    err.message = response.statusText;
    try {
      let data = response.json();
      if (data && data.message)
        err.message = data.message;
    }
    catch(ex) { }
    if (!err.message)
      err.message = "Unknown server failure.";
    return Observable.throw(err);
}
I can then generically parse all API exceptions like inside of the service that calls the server API using the Angular Http service:
// service method
saveAlbum(album) {
    return this.http.post(this.config.urls.url("album"),
                          album)
    .map( response => {
      this.album = response.json();
      return this.album;
    })
    .catch( new ErrorInfo().parseObservableResponseError );
}
The service is then called from a component like this:
// component method
saveAlbum(album) {
    return this.albumService.saveAlbum(album)
      .subscribe((album: Album) => {
          this.error.info("Album saved.");
        },
        err => {
          // display the error in error component
          this.error
              .error(`Unable to save album: ${err.message}`);
        });
};
In the UI this looks something like this then:

This makes the client side error handling very clean as I never have to figure out what format the error is in. The server returns errors with a .message property and the client error parser automatically tries to parse any errors that don't already have an error object into an error object, so that the UI code always is guaranteed a consistent object.
This makes error handling in API calls very easy following a very simple passthrough pattern where the expectation is that everything has a .message property (plus some optional additional information).
Adding Logging with Serilog
Back on the server we now have error handling, but now I also want to log my errors to disk.
If you look back at the initial filter code I left a couple of comment holes for logging.
When unhandled exceptions occur I would like to log those errors to the configured log provider. Personally I prefer file logs, but ASP.NET Core doesn't include support for a built-in file log provider (it's coming in future versions). For now I'm going to use Serilog, which is an excellent third party log package with tons of integration options including a rolling file sink. I'll use it to write logs that roll over to a new file daily.
To set this up I'm going to add a couple of Serilog packages and add some additional ASP.NET Logging packages in project.json:
"dependencies": {
    ..."Microsoft.Extensions.Logging": "1.0.0","Microsoft.Extensions.Logging.Filter": "1.0.0","Microsoft.Extensions.Logging.Console": "1.0.0","Microsoft.Extensions.Logging.Debug": "1.0.0","Serilog.Extensions.Logging": "1.2.0","Serilog.Sinks.RollingFile": "3.1.0"
}
Next I need to configure logging in the Startup.Configure() method:
// Serilog configuration
Log.Logger = new LoggerConfiguration()
        .WriteTo.RollingFile(pathFormat: "logs\\log-{Date}.log")
        .CreateLogger();

if (env.IsDevelopment())
{
    // ASP.NET Log Config
    loggerFactory.WithFilter(new FilterLoggerSettings
        {
            {"Trace",LogLevel.Trace },
            {"Default", LogLevel.Trace},
            {"Microsoft", LogLevel.Warning},
            {"System", LogLevel.Warning}
        })
        .AddConsole()
        .AddSerilog();

    app.UseDeveloperExceptionPage();
}
else
{
    loggerFactory.WithFilter(new FilterLoggerSettings
        {
            {"Trace",LogLevel.Trace },
            {"Default", LogLevel.Trace},
            {"Microsoft", LogLevel.Warning},
            {"System", LogLevel.Warning}
        })
        .AddSerilog();
    // ...
}
Serilog requires some configuration and the first line above configures the default logger.
Use the Serilog Singleton?
Serilog actually works as a Singleton, so in theory you could just use Logger.Log directly to log to file. Once configured you can simply do something like this:
Log.Logger.Information("Applicaton Started");
...
Log.Logger.Information(ex,"Failed sending message data to server.");
However, using this approach you bypass any other providers hooked up to the ASP.NET logging pipeline. In this case my application also logs to the Console in debug mode, and I also want to log warnings and errors that ASP.NET generates internally. If I want all of this to go to Serilog's output I have to run through the ASP.NET Logging pipeline which requires that I use configuration through Dependency Injection.
Injecting the Logger into the Exception Filter
In order to use the logger in my Exception filter I have to first allow it to be injected into the constructor:
public class ApiExceptionFilter : ExceptionFilterAttribute
{
    private ILogger<ApiExceptionFilter> _Logger;

    public ApiExceptionFilter(ILogger<ApiExceptionFilter> logger)
    {
        _Logger = logger;
    }

    // ...
}
I can then add following for the Unhandled Exception handler without:
_Logger.LogError(new EventId(0), context.Exception, msg);But we're not quite there yet. The standard filter attribute doesn't support dependency injecttion. Once you add dependencies a different approach is required:
- Use the
[ServiceFilter]Attribute - Add the filter to the Injection list
Let's change the filter declaration on the controller to:
[ServiceFilter(typeof(ApiExceptionFilter))]
public class AlbumViewerApiController : Controller
In addition I need to declare the ApiExceptionFilter as a dependency in the DI configuration in the ConfigureServices() method of Startup.cs:
services.AddScoped<ApiExceptionFilter>();And voila - now our logging should work with the injected ASP.NET Logger and I can do:
_Logger.LogWarning($"Application thrown error: {ex.Message}", ex);
_Logger.LogWarning("Unauthorized Access in Controller Filter.");
_Logger.LogError(new EventId(0), context.Exception, msg);
Which produces output like the following (for the last item which is the unhandled exception):
2016-10-14 18:58:43.109 -10:00 [Error] This is an unhandled exception
System.InvalidOperationException: This is an unhandled exception
   at AlbumViewerAspNetCore.AlbumViewerApiController.Throw() in
   C:\...\AlbumViewerApiController.cs:line 53
   at Microsoft.AspNetCore.Mvc.Internal.ControllerActionInvoker
                .<InvokeActionFilterAsync>d__28.MoveNext()
Yay!
Dependency Injection - not always easier
If you're new to Dependency Injection you probably think that the DI implementation here adds a ton of ceremony around what should be a really simple task. I agree. Having to register a filter and then explicitly using a special attribute syntax to get the injection to work seems like a huge pain in the ass. Especially since it seems that DI could automatically be handled by the standard Filter implemenation. I'm not sure why that doesn't just work, but my guess it's for performance as DI does add some overhead.
FWIW, Serilog supports a static Singleton logger instance that you can use and bypass all of the ceremony. If you just want to log your own errors and don't care about the rest of ASP.NET's logging features, then you can skip dependency injection entirely and just use the Serilog's Singleton directly:
Log.Logger.Error(context.Exception, "An unhandled error occurred. Error has been logged.");which produces the following in the log file:
2016-10-15 11:02:09.207 -10:00 [Error] An unhandled error occurred. Error has been logged.
System.InvalidOperationException: This is an unhandled exception
   at AlbumViewerAspNetCore.AlbumViewerApiController.Throw() in
   C:\projects2010\AlbumViewerVNext\src\AlbumViewerNetCore\Controllers\AlbumViewerApiController.cs:line 53
   at Microsoft.AspNetCore.Mvc.Internal.ControllerActionInvoker.<InvokeActionFilterAsync>d__28.MoveNext()
Clearly this is a much simpler approach, but you lose the ability to also log to other log providers configured in ASP.NET. In short you have options - you can do things the 'recommended' way or choose a simpler route if that works for you. Choice is good.
Alternatives
Creating an exception filter to handle unhandled exceptions is one way to handle errors. It's a reasonably reusable approach - you can create an easily reusable implmentation of a filter that can easily be applied to many APIs and applications.
Another approach could be to create custom middleware that automatically scans for API requests (ie. requests that Accept: application/json or text/xml perhaps) and handle errors as part of the middleware pipeline. The implementation of such middleware would be conceptually similar, but with the added bonus of having a more common configuration point in the ASP.NET Core configuration pipeline (via ConfigureServices and Configure methods in Startup.cs).
However, personally I feel that using a filter is actually a better choice as in most application exception handling tends to be more 'personal' in that you end up configuring your error logging and perhaps also the error response logic. Using a simple baseline to inherit from or even just re-implment seems more effective than trying to have a do-everything piece of middleware with cryptic configuration switches.
If there's interest in this we can explore that in a future post - leave a comment if that's of interest to you. For now I feel that an API filter that you can apply to specific controllers offers more control.
Summary
Exception handling in API application's is rather important as errors - both handled and unhandled - need to be passed to the client in some way to let it know that something went wrong. By having a consistent error format for all errors the client can use a common approach to handle errors - you don't want the client to receive HTML error pages that it won't be able to do anything useful with.
The best way to handle this in your ASP.NET Core API is to create an ExceptionFilter that intercepts all exceptions and then returns an error object in a common format. You'll also want to make sure you capture the error information and log it, and to make sure you differentiate between 'known' errors and unhandled errors, in order to not return sensitive data back to the client.
I've been using this approach forever for services, even in pre-JSON days and it works well. It's almost silly that this isn't a built-in feature of the API implementation in ASP.NET core. Since content-negotiation is a thing, why shouldn't error results in those same content negotiated formats also be automatic? But using MVC/API Exception Filters are pretty easy to implement so it's not difficult to create the behavior you want on your own. Either way there's no reason not to return consistent error information for your APIs.
Resources
Image Copyright: aruba2000 / 123RF Stock PhotoPost created with Markdown Monster
© Rick Strahl, West Wind Technologies, 2005-2016
Posted in ASP.NET Core Angular
↧
Automating Installation Builds and Chocolatey Packaging

In my work with Markdown Monster I've been pushing new release (ok pre-release) builds out several times a week. It's trivial for me to package my current build into a setup executable and publish it into the right place in a few minutes, simply by using some automated Powershell scripts.
This may not be news to some of you, but for me - someone who doesn't work frequently with desktop applications - having a full build pipeline that goes from build all the way through a deployable Installer and Chocolatey package has been a huge boon for me, when I started implementing it about a year ago or so for all of my desktop apps.
In this post I'll describe the admittedly simple process I use to create my Markdown Monster packages - installer and Chocolatey package and upload my code to my server and GitHub for releases. I'm writing this more for myself in order to have one place to keep all of this information, but some of you may also find this useful, and perhaps have some anecdotes of your own that you might share in the comments.
Build Automation
Markdown Monster is a WPF desktop application that has a fairly simple footprint and installation process. It's basically a single folder hierarchy installation (assuming .NET is installed), plus a bunch of registration features - file extension, PATH, IE Version etc. - handled by the installer. Even though it's pretty simple install, getting all the pieces together to create a one click install still involves quite a few steps.
In my build process there are four grouped sets of operations:
- Building the installer
- Uploading the installer to the Web site
- Pushing a release to Github
- Creating and publishing a Chocolatey Package
which breaks down into a lot more detailed steps:
- Create a distribution folder
- Copy files from various locations into this distribution folder
- Code sign the main EXE
- Run the Installer Packaging (Inno Setup)
- Code sign the resulting Setup EXE
- Create a zip file from the Setup EXE
- Create a version specific copy into the Releases folder
- Publish the release version to my Web server for download
- Commit and Push the release to Github (which will be linked to Chocolatey)
- Build a Chocolatey package that references the release on Git
- Publish the Chocolatey package
Doing all of this manually would be crazy time consuming, but - ahem - I usually start with manual publishing initially before I hit the "this is too much work" stage and create an automated build. I think I'm to the point now where, when I create a new project, the build process is hooked up right from the start, because it's easier to do it in stages than all at once. I think when I did last with Markdown Monster, it took the better part of the day to get the build steps all working and tested properly.
Let's take a look and see how I automate these operations.
Building an Installer
As is often the case I started simple with a Powershell script a while back and then kept adding stuff. The first and perhaps most time consuming task is the Install package builder.
My build script looks something like this:
$cur="$PSScriptRoot"
$source="$PSScriptRoot\..\MarkdownMonster"
$target="$PSScriptRoot\Distribution"

robocopy ${source}\bin\Release ${target} /MIR
copy ${cur}\mm.bat ${target}\mm.bat
del ${target}\*.vshost.*
del ${target}\*.pdb
del ${target}\*.xml

del ${target}\addins\*.pdb
del ${target}\addins\*.xml

cd $PSScriptRoot

& "C:\Program Files (x86)\Microsoft SDKs\Windows\v7.1A\Bin\signtool.exe" sign /v /n "West Wind Technologies" /sm /s MY /tr "http://timestamp.digicert.com" /td SHA256 /fd SHA256 ".\Distribution\MarkdownMonster.exe""Running Inno Setup..."& "C:\Program Files (x86)\Inno Setup 5\iscc.exe" "MarkdownMonster.iss" & "C:\Program Files (x86)\Microsoft SDKs\Windows\v7.1A\Bin\signtool.exe" sign /v /n "West Wind Technologies" /sm  /tr "http://timestamp.digicert.com" /td SHA256 /fd SHA256 ".\Builds\CurrentRelease\MarkdownMonsterSetup.exe""Zipping up setup file..."
7z a -tzip "$PSScriptRoot\Builds\CurrentRelease\MarkdownMonsterSetup.zip" ".\Builds\CurrentRelease\MarkdownMonsterSetup.exe"
The first part deals with setting up the Distribution folder that can be pushed into the installer (and that actually lives in an external .ps1 file). The code then signs the EXE, runs the installation packaging (Inno Setup's CLI), signs the final Setup EXE and finally also creates a zip file that embeds the setup EXE (apparently lots of organizations don't allow downloading of EXEs, but some a zipped EXE is fine - go figure).
All in all this process takes about 20 seconds to run - most of it taken up by Inno Setup - which is not bad for an automated build at any time, using only spit and duct tape :-)
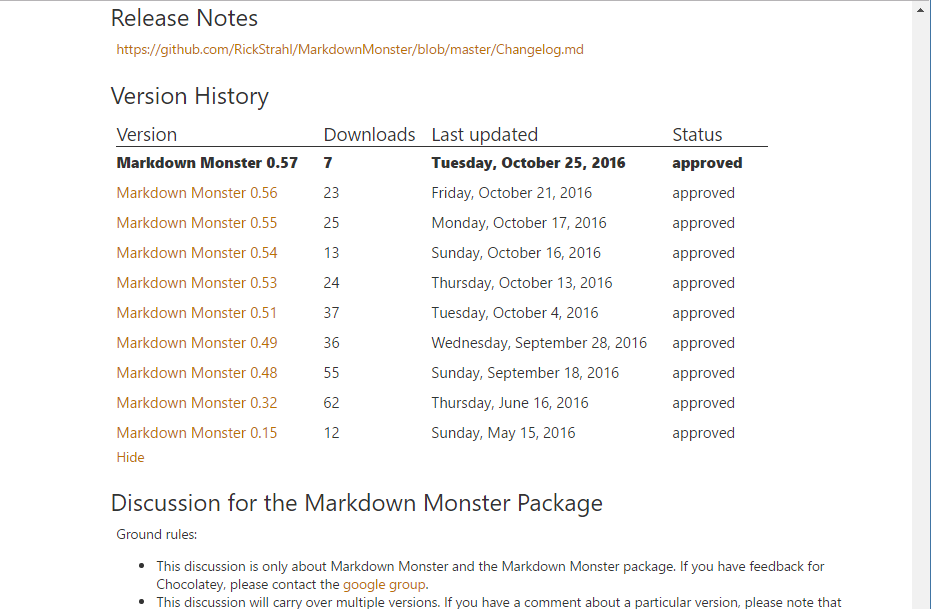
Creating Releases and Uploading
Once I have a build that's ready to be released I create a copy of the setup exe and store it in a releases folder with a version number. The EXE releases are checked into the Git repo, and published along with the rest of the project and pushed to GitHub.
These releases are ultimately referenced by Chocolatey for specific version downloads when doing a choco install.
The checking process and release file creation is manual, because it only happens for actual releases which is not that frequent (ie. maybe a few times a week).
I also upload the the final Setup package, the Zip file and a version file to my Web site. The version file is an XML file that is used to check for the latest version and again, I change the version here manually because it only happens when I'm ready to create a final published release.
The version XML file looks like this:
<?xml version="1.0" encoding="utf-8"?><VersionInfo><Version>0.57</Version><ReleaseDate>October 26th, 2016</ReleaseDate><Title>West Wind Markdown Monster 0.57 now available</Title><Detail>
This update adds a new Markdown Parser that better supports Github Flavored Markdown courtesy
of a new Markdown parse: MarkDig. There are also new options for creating links that open in a new window.

The latest version of the installer and binaries are now code-signed for source verification from West Wind.

For more detailed release info please see:
https://github.com/RickStrahl/MarkdownMonster/blob/master/Changelog.md
</Detail></VersionInfo>
This file is used both by Markdown Monster's internal version checking. The file is also used by the Web site to get the latest version to display on the home page and the download page.
Once the build's been completed I upload to the Web site with a small Powershell script:
$uid= Read-Host -Prompt 'Username'
$pwd=Read-Host -Prompt 'Password' -AsSecureString
$pwd = [Runtime.InteropServices.Marshal]::PtrToStringAuto(
       [Runtime.InteropServices.Marshal]::SecureStringToBSTR($pwd))

if(!$pwd) {Exit;}

curl.exe -T ".\Builds\CurrentRelease\MarkdownMonsterSetup.exe"  "ftps://west-wind.com/Ftp/Files/" -u ${uid}:${pwd} -k
curl.exe -T ".\Builds\CurrentRelease\MarkdownMonsterSetup.zip"  "ftps://west-wind.com/Ftp/Files/" -u ${uid}:${pwd} -k
curl.exe -T ".\Builds\CurrentRelease\MarkdownMonster_Version.xml"  "ftps://west-wind.com/Ftp/Files/" -u ${uid}:${pwd} -k
which makes it quick and easy to get all the files uploaded.
Chocolatey Builds
I really love Chocolatey and if you don't know about Chocolatey, do yourself a favor and head over to the site and install it. Chocolatey is a packaging solution for Windows that makes it easy for you to download and silently install software with a few steps. You can find most utility and developer related tools on Chocolatey and you can even install software that has to be licensed although in those cases you might have to apply a license before running. Chocolatey handles downloading and installing packages by running a silent installer. Once installed you can easily update installed packages using the choco upgrade command. Because Chocolatey is a command line tool, it's easy to automate and create install scripts with that can download and install all sort of software. Chocolatey has made it much easier to set up a working and dev environment on a new machine - quickly.
As a software vendor or tool provider I also publish several packages on Chocolatey - cause it's pretty easy to create packages. What's not so nice right now is that it takes quite a while for new packages to get approved due to the review requirements, but that's supposed to be getting better with better automated tooling and additional reviewers.
Publishing on Chocolatey
I distribute Markdown Monster via Chocolatey. I have to admit that even though I publish several packages I've found it hard to decide on how to best publish my packages on Chocolatey. They provide a number of different ways, where you can either provide a downloaded installer or an embedded installer. After a few iterations I've settled on downloaded installs, but I played around for a while with embedded installers. It seems that embedded installs are more work to create, take longer to upload (and often seem to time out) and take much longer to get approved. There are also a number of rules surrounding embedded installs, that caused me eventually to abandon the idea of embedded installs. So I went back to using downloaded installs.
One key thing to remember about downloaded installs is that you need to make sure to keep all versions you distributed on Chocolatey around - it's not good enough (anymore now with Checksums) to simply point at the current release URL. Rather each version has to provide a unique checksum for each file.
Currently I distribute the current release version via download from my Web site, and release tied versions that provide a version history from Github as part of the Markdown Monster repository. It's important to have access to historic releases if you plan on keeping Chocolatey's version history whereby you can download old versions. The Chocolatey versions then point at the raw files in the GitHub repo.
These releases all point at the GitHub release versions:
Scripting Chocolatey Package Creation
One of the nice things about Chocolatey is that it's pretty easy to create a package. A package is really just a Nuget XML manifest file and a Powershell script that describes how to run the installer.
This gets tedious though - as you have to grab a checksum and add it to the script file each time, so for a long time my process was manual.
But finally decided to automate that part as well and it's surprisingly easy with Powershell. The Chocolatey Packaging script I use does the following:
- Grabs just the filename of the latest release build from release folder
- Captures a CheckSum from the file
- Rewrites the
chocolateyinstall.ps1file with filename and checksum - Creates Chocolatey Package
- Uninstalls existing Choco package
- Installs new Choco Package from current folder
When I finally decided to automate this process I ended up with this code:
# Script builds a Chocolatey Package and tests it locally
#
#  Assumes: Uses latest release out of Pre-release folder
#           Release has been checked in to GitHub Repo
#   Builds: ChocolateyInstall.ps1 file with download URL and sha256 embedded
cd "$PSScriptRoot"

# Example: "MarkdownMonsterSetup-0.55.exe"
$file = gci ..\builds\prerelease | sort LastWriteTime | select -last 1 | select -ExpandProperty "Name"
$sha = get-filehash -path ..\builds\prerelease\$file -Algorithm SHA256  | select -ExpandProperty "Hash"

# Echo
write-host $file
write-host $sha

# Fill into Choco Install Template
$filetext = @"
`$packageName = 'markdownmonster'
`$fileType = 'exe'
`$url = 'https://github.com/RickStrahl/MarkdownMonster/raw/master/Install/Builds/PreRelease/$file'
`$silentArgs = '/SILENT'
`$validExitCodes = @(0)

Install-ChocolateyPackage "`packageName" "`$fileType" "`$silentArgs" "`$url"  -validExitCodes  `$validExitCodes  -checksum "$sha" -checksumType "sha256""@

# Write it to disk
out-file -filepath .\tools\chocolateyinstall.ps1 -inputobject $filetext

# Delete any existing NuGet Packages
del *.nupkg

# Create .nupkg from .nuspec
choco pack


choco uninstall "MarkdownMonster"

# Forced install out of current folder
choco install "MarkdownMonster" -fdv  -s ".\"
This script builds the package and tests it locally from the current folder. By running it I can check for errors, before submitting the package to Chocolatey.
When it's all said and done and I know the package works locally, I end up with .nupkg package file for my version and I can then just manually do:
choco pushto push the package to the server. Yay!
As is usually the case with tools, it takes a little time and tweaking to get everything to work just right and work out the odds and ends of edge cases. But overall the process I describe here is easy to setup and also easy to run and maintain.
At the end of the day I basically have a few scripts:
- CopyFile.ps1 // called form Build.ps1
- Build.ps1
- Upload.ps1
- Build.ps1 // chocolatey
In addition there are still a few manual steps for final releases:
- Change the version number and release notes in Version.xml file
- Create a version release copy of current build and copy to release folder
- Publish to Github
- Manually change the version number in the Nuget
.nuspecfile
Which is minor for an actual published release and is usually done in a few minutes. I could also automate these steps, but it doesn't seem worth it and... more importantly it's a good idea to review the release version and nuget files to update release notes and double check whether any other info has changed, so I'm OK with manually fixing these up.
In the end the main thing for me is: It works well with minimal fuss.
If you want to take a closer look at how this all works you can check it out in the Markdown Monster GitHub repo:
Here you can find the build scripts, the Inno Installer script, the Chocolatey package and the current and versioned releases.
Build Tools?
So I've been using script files to do this, and it works pretty well. But error handling is pretty marginal, although that's not really been an issue and this isn't exactly a mission critical piece of kit, so if something fails I can look at the errors, fix or comment out whatever code doesn't work and try again.
But recently after listening to Scott Hanselman's episode on HanselMinutes about Cake I'm wondering if I should be using a more fully featured build tool. I would love not having to wade through Powershell's godawful syntax.
Looking over the documentation, Cake does look really nice - especially for cross platform projects - but I'm not sure if it buys me much for a relatively simple desktop install as mine. It's something I'm going to keep in mind next time I need to build an install 'pipeline' like what I described above from scratch.
What are you doing for builds - especially for standalone applications like this? Are you doing what I do and use simple script? Or do you use something more sophisticated - drop a line in the comments, curious to hear what others are doing.
Summary
Regardless of whether you use duct tape and spit as I do with my Powershell scripts, or use a full blown build tool, having a quick and easy way to build a final deployable application in a few minutes has been a huge motivation for me. I can update code and release a new build as soon as a bug is fixed, and my release cycle is much more frequent than it was before. I used to be much more conservative with releases - if something was broken it'd have to wait. But with an easy release mechanism all of that has changed and I can push new releases out much more frequently and I really like the fact that it works this way.
Resources
Post created with West Wind Markdown Monster
© Rick Strahl, West Wind Technologies, 2005-2016
Posted in Windows
↧
↧
Excluding the node_modules Folder in Visual Studio WebSite Projects

If you're working on a client side project that includes an NPM folder with a large number of dependencies and you're using a WebSite Project in Visual Studio, you've probably found that this is a terrible combination out of the box. It results in very slow load times and/or file load errors.
What's the problem?
WebSite Projects (WSP) are a pure file representation on disk, so they show you all files, including the crazy large number of files in the node_modules folder which isn't excluded by default.
WebSite Projects are created and mapped to a folder:

The problem is that WSPs don't have a project file. There's no file mapping, which is one of the primary reasons why it seems like a good idea for client side projects in the first place; nobody wants to maintain and add files manually to a project when managing files externally.
The downside is that you have no control over what gets pulled into the project. There is absolutely no configuration in Web site projects. This affects both the files you see in the 'project' as well as for publishing, although for publishing there is at least some control via a *.pubxml file where you can exclude files and folders from publishing. Unfortunately that's not true for the file content of the 'project'.
In short if you have a massive node_modules folder that folder shows in the project. There's no official, built-in way to limit files or folders - which seems rather silly given that this is such a common use case and we're easily 5 years in from when NPM became a common Web development 'thing'.
Why WebSite Projects?
For most ASP.NET applications I use Web Applications which are functionally opposite - you have all the control over files in a project so much so that you have to explicitly add every single one. For applications that include .NET code Applications that makes good sense. As it does when you actually work entirely in Visual Studio for your client side project where you manage all files through the IDE.
But Web Applications fall apart when files are not added and maintained through Visual Studio.
I use WebSite Projects only for static content sites (main site, product sites), or as is the case now when working for a client who insists that the project I'm working on with other tools shows up in Visual Studio and uses the same source control access.
I'm working work on an Angular 2 project, and although I don't actually edit the Web code in Visual Studio - I'm using WebStorm - due to requirements and the TFS source control in use, the Web site needs to be part of the larger Visual Studio Solution. The Web site is pure client side code, with the API and service projects that the Angular app calls living in completely separate projects. Since I'm modifying files external to Visual Studio a WebSite Project seems like the only reasonable choice.
WebSite Projects Experience
When I created the WebSite Project and added it into the larger Visual Studio solution, I found out quickly how terrible the support for client projects is in that configuration.
I ran into two major issues:
- Extremely slow load time as VS parses through 20,000 NPM files
- TFS Errors due to funky filenames (files starting with
$.)
Initial load of the project took about 5 minutes while Visual Studio white screened and only eventually returned. When it came back I got a ton of TFS errors for $. files - about 100 of them that I had to CR through.

It's quite remarkable that Microsoft hasn't addressed such a common scenario. Eventually I end up with the node_modules folder in the project.

But - refreshing the folder, or re-opening the solution goes right back to the slow load time and then those very same errors. Seriously???
Solution: Make node_modules Hidden
The solution to provide a reasonable experience is to mark the node_modules folder as a hidden folder. This effectively hides the folder from Visual Studio and it ignores it in the Solution Explorer.
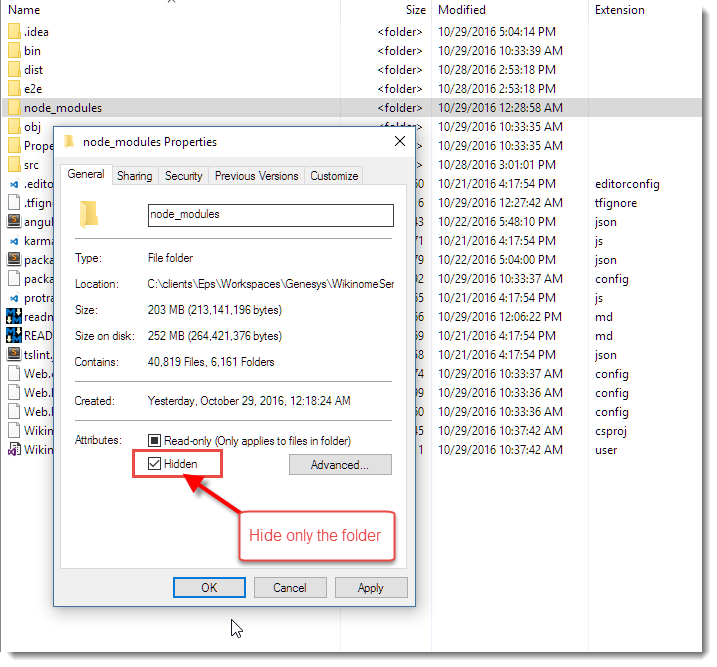
You can set the hidden attribute on the folder only - no need to set it on all the child items. NPM continues to work with the hidden folder, so there appears to be no ill effect for actual package access.
Once I did this the node_modules folder is no longer included in the project and load times are fast:

Yay!
For source control and TFS, I also had to add a .tfignore with:
\node_modulesto ensure that source control also ignores the folder - it doesn't seem to mind the hidden folder and otherwise would still try to add it. Hiding the folder also prevents Web Deploy from publishing the files.
So, if you must use WebSite Projects, hiding the node_modules folder is the way to go.
I can't take credit for this - I found this as part of a few StackOverFlow posts - but the solution is not clearly identified or searchable, so hopefully this post will make that a little easier to find.
Looking Forward: Visual Studio 15 (VS2017?)
The next version of Visual Studio - version 15 apparently will introduce a new Web project model that's supposed to be a hybrid between Web Applications and WebSite projects.
There is a project file, but files by default add without explicit adding using an exclusion template. This seems like a pretty obvious solution - shame it took well over 10 years for Visual Studio to figure that one out especially since just about any other Web development tool operates that way.
I haven't played with Visual Studio 15 yet, but I really hope this will be a workable scenario going forward. Visual Studio really needs to have an easier way to deal with free form file based sites.
© Rick Strahl, West Wind Technologies, 2005-2016
Posted in ASP.NET Visual Studio
↧
C# NumberFormat Sections
In all the years I've been using C#, I've completely missed that the NumberFormat features using .ToString() or string expressions support sections for positive, negative and zero values. In this post I describe the feature and how it works.![]()
![]()
![]()
![]()
![]()
![]()
![]()
↧
Windows Update Hell
Once again I'm in Windows Update hell. It's not the first time I've arrived here, but this time around it's a special kind of hell because of Microsoft's misguided policy on update management that makes it damn near impossible to opt out of updates.
The problem
Some time ago - prior to release of the Windows 10 Aniversary update - I was signed up to the Insiders Program because I wanted to play with some of the new features that came in AU. Specifically the integrated Bash shell and some of the IIS improvements. All went well at the time and when the final of AU rolled around I turned off receiving of Insiders builds to get back onto a stable machine that doesn't update every couple of weeks. Life was back to normal.
About a month ago however things started going sideways. Updates started to fail starting with KB3194798 and then later with a newer update KB3197954. In both cases the updates start installing, get to 96% and then:

All in all this takes 3 restarts to get through.
@#!!@ Daily Update Retries
This is bad enough, but it gets worse: The updates continue coming daily wanting to update EVERY day installing the same failed update again and again.
Due to Windows 10's new policy of an update schedule that checks daily for updates these failed updates - and their 3 restarts - fire every day, without prompting or asking. They just shut down Windows (or wake it up from sleep) in the middle of whatever is happening even if the computer is off. The result is when I return from dinner each night the machine is rebooted. This is made worse for me as I dual boot into the Mac so the updates don't automatically go through their reboot dance.
Check out this fucked up update log:

You'd think the updater might be smart enough to figure out after a couple of failed update attempts that this update isn't going to work. But no that would be too simple...
I also continually see this dialog:

It says there's an update pending even though I've previously - unsuccessfully - installed this update just minutes before. So Windows failed to install an update and immediately decides it wants to immediately install the update AGAIN.
The real kicker however is that I can't turn the updates off.
There's a Microsoft Utility that you can download to explicitly keep certain updates from installing. I did this with an earlier install and it worked with KB3194798, but doesn't with KB3197954 which never shows up on the list of updates to install. So that's out.
What I tried
A lot of people had problems with KB3194798 and there were a lot of workarounds floating around for this one. I tried all of them and had no luck.
I'm on
Windows 10 (1607 14393.187)
Use the Windows Update TroubleShooter
This thing says it found things to fix every time it runs:

but in the end this has no effect and the updates continue to fail.
Remove XBox Scheduled Tasks
Apparently with the original failing update many people reported that the issue was related to a XBox related scheduled task that wasn't shutting down properly and couldn't update. I first disabled, then removed those tasks (I don't use XBox - WTH is this even here, much less screwing with a Windows update?). Microsoft had originally released Windows 10 1607 Script fix to unblock update for Windows Insiders to address this. I ran this but again - no luck.
Offline Install
Finally I downloaded and installed the initial update completely offline. I:
- Disconnected all devices from the machine
- Shutdown network connections
- Ran the update install locally
Didn't work either.
Hide Updates
When I originally started having problems with KB3197954 I was able to use the Windows Show Hide Update Utility from Microsoft.

But with KB3197954 that update doesn't even show up in there so I can't hide it.
- ??? I'm fresh of ideas at this point, short of paving the machine.
Who you're gonna call?
What's really frustrating about this is that there seems to be no good online resources you can turn to for these type of issues. The answers I did find tended to be scattered all over the place from ServerFault to Microsoft forums (with some really lame Microsoft employee responses - anything useful came from other users) to obscure forums. There was lots of interesting information that was overall helpful but unfortunately not what it took to resolve my issue.
At this point I'm at a loss. I'm not totally adverse to reinstalling - this Windows install pre-dates the initial Windows 10 release, but it's otherwise stable and still quite fast (ie. not Window bit rot that I notice) so I would rather avoid it.
Anybody out there have any other suggestions on what else to look at?
Sad, Sad, Sad
All I can say is that this sad - really sad. Updates have always been a pain, and failed updates are a reality of life in general. Before those Mac heads go on and say - get a Mac (this IS on a Mac) I've had a similar FAIL on the OS X with the Yosemite update a year or so back that would not want to install and required a repave as well.
Failed Updates are OK - but retrying failures over and over again without a way to turn off the pain is definitely not.
Doing the same failed thing over again, is... Insanity
But continuing to fail repeatedly, doing the same failed update over and over is just plain dumb. With all of this machine logic Microsoft talks about day in and day out, maybe they should spend of that common sense to the Windows Update engine and have some rudimentary logic that can figure out a basic failure pattern and stop making life miserable.
Tell us what the problem is!
Worst of all is that there are no good troubleshooting tools. Why isn't there a link somewhere that points at a log when an update fails. Or hey, how about an error message that actually says something useful like - hey your video driver is locked or we can't connect to the registration server - anything - instead of "We couldn't complete the updates - now buzz off". I get that you don't want to scare non-technical folks, but a link a small link that allows getting at that info would be freaking glorious compared to this insane opacity.
Windows update logs aren't the right answer here either because those can be near impossible to parse for a non-Microsoft person, but heck the installer has to know what the last thing it was working on that failed. This isn't rocket science.
Ok I'm done ranting :-)
Post created with Markdown Monster© Rick Strahl, West Wind Technologies, 2005-2016
Posted in Windows
↧
Introducing Markdown Monster - a new Markdown Editor

I'm happy to announce that Markdown Monster 1.0 RTM is now available. Yay!
If you just want to check it out here are links for the download and more info:
- Markdown Monster Site
- Markdown Monster Download
- Markdown Monster on Chocolatey
- Markdown Monster on GitHub
Getting Started Video
A couple of weeks ago I created a Getting Started video that goes over most of Markdown Monster's features. You can find it on YouTube:
What's Markdown Monster?
Markdown Monster is an easy to use and attractive Markdown Editor and Viewer as well as a Weblog Publishing tool. The editor sports syntax colored editing of Markdown text, inline spell checking, an optional live and themable HTML preview, easy embedding of screen shots, images and links, along with a few gentle toolbar helpers to facilitate embedding content into your markdown. The editor's goal is to let you focus on your content creation and not get in your way of your creativity.
There are many small features to make working with Markdown easier: You can import HTML into Markdown from files or the clipboard, export Markdown to HTML files on disk or the clipboard, and quickly access a document's folder in Explorer or a Windows Console Window.
You can also publish your Markdown directly to your Weblog if it supports WordPress or MetaWebLog endpoints. You can manage multiple blogs and even download existing posts as Markdown.
Why another Markdown Editor
So you might ask, Why another Markdown Editor? After all there are several of them already out there and Markdown editing isn't exactly a sexy thing.
Markdown Monster provides all the features you'd expect from a Markdown editor:
- Syntax Colored Markdown Editing
- Fast text editing using a code editor
- Live Markdown Preview
- Inline Spellchecking and Correction
- Minimal Toolbar/menu support
- Support for fenced code blocks
- Support for many advanced Markdown features (coutesy of MarkDig)
but it also provides a number of additional features that I think are rather useful and important:
- Capturing and Embedding Screen Shots
- Quick embedding of Images and Links
- Easily customizable Preview Themes
- Themeable Editor
- HTML to Markdown conversion
- Built-in Weblog Publishing
- Add-in Interface to allow extensions
Extensibility
The last point of extensibility is important to me and a couple of Markdown Monster's key features - the Screen Capture and Weblog Publishing modules - are actually implemented as add-ins. The add-in extensibility allows you to create custom extensions that can hook into the editing and document life cycle so you can embed custom content into posts and perform custom tasks on the document.
For example, I have a custom add-in that I use to download and publish inventory item information to my Web store using a custom API wich makes product editing a lot easier than the online textbox typically used. Other ideas include a snippet manager for custom Markdown Snippets to inject or a Git commit plug-in that can quickly commit and push changes to a git repository, which is useful for Git based documentation or blog systems.
Whether people will take advantage of the .NET Extensibility is another thing, but I know I already have and will continue to benefit from this extensibility and keep the core version of Markdown Monster relatively small.
All Things Markdown
I use Markdown for a lot of things these days:
- Source Code Repositories
- Documentation in my Help Builder tool
- On my Support Message Board
- Creating Blog Posts
- General purpose Document editing
- Application integration for any Free Form text
- Support for maximum Markdown Features
In short Markdown for me is just about everywhere. It's amazing how quickly it has gone from being something I used for Git repo docs to becoming something I use in just about all aspects of development and daily work.
I started Markdown Monster off as a small pet project for myself a little over a half year ago when another editor I was using started failing. It quickly grew from there as I shared the initial editor with a few people I worked with and they started asking for a few additional features and it quickly grew more serious from there. I decided to make this tool something to be proud of and something that I would love to use, and for me at least that's been absolutely true. I practically live in the editor these days - mainly for documentation and blog editing.
A half a year later and a lot of effort later, I'm really happy that I went down this path because I ended up with (IMHO) much more usable editor than what I'd found before, and an editor that addresses many of the missing features that I - and most likely many of you - care about to make my editing experience quick and easy.
Open Source, but licensed
Markdown Monster is open source with code out in the open on GitHub, but the software itself is licensed and requires registration for continued use. The download is fully functional, except for the occasional nag screen.
A few Screenshots and Feature Overview
The best way to see Markdown Monster is just to try it out, but if you want to quickly get a feel for it here are a few screenshots and some commentary on features.
Main Editor
Here's what the main workarea of Markdown Monster looks like:

The main area is made of the edit area on the left, and the preview on the right. The preview is optional and can be collapsed using the World button at the of the window.
Theming for Preview and Editor
Both the preview window and the editor can be themed using the two dropdowns on the status bar on the right. The default editor theme is the dark twilight theme and Github for the preview. Several other themes are available and you can easily create new themes that match your preferences. Preview theme customization can be very useful to match your site's styling especially when posting Weblog posts.
Here's the MM with the visualstudio editor theme and blackout preview theme:

Syntax Colored Markdown and Code
The editor uses syntax colored highlighting for markdown text that highlights things like bold text, headers, lists, html and code in different colors than main body text.
Certain types of code - HTML, JavaScript, CSS, XML, JSON - also show as syntax colored text inside of fenced code blocks.

Inline Spell Checking
The editor also supports indline spell checking which provides suggestions. The editor supports different languages and you can add any Open Office style dictionary for other languages that are not provided as shipped(en-US,es-ES,de-DE,fr-FR). If there are words that you don't want highlighted you can add them to a custom dictionary that will be used when editing.

Multiple Documents
You can have multiple editor windows open at the same time and switch between them. Markdown Monster can optionally remember open documents and re-load them when it restarts.
Gentle Toolbar support
The editor can use toolbar and menu options to inject Markdown markup into the document, but that's of course optional. However, operations like link and image embedding provide some smart features like preloading URLs from the clipboard and for images optionally copying images to the document folder if loaded from a different location.
Tab Operations
Tabs show you the active document name, including the full filename on hover. Right clicking on a document tab brings up a context menu that allows you to open the document's folder in Explorer or open a Terminal window.

These are useful for quickly editing images, or for using the command line to do things like make a commit to Git.
Screen Captures
You can easily capture screen shots with Markdown Monster using either a built-in minimalistic capture utility that allows you to capture windows, or using the popular SnagIt utility from Techsmith.
Here's what the built-in screen capture looks like:

The built-in tool lets you select Windows or Window areas to capture and then displays them in a preview window. Using this capture window you can also capture the active desktop, or an image from the clipboard.
Using SnagIt offers some additional features, like the abililty to choose the capture mechanism for free form selection captures or Window captures and you direct access to the Editor and the various image tools and effects you can apply to the captured image.

SnagIt 13 Issues
SnagIt 13 currently doesn't work properly with Markdown Monster due to a bug in SnagIt's COM interface - this will be fixed by Techsmith in a future update of SnagIt 13)
Weblog Publishing
One important feature for me is the ability to take my Markdown and publish it to my blog. Markdown is ultimately turned into HTML and you can use Markdown Monster to create your blog entry text in Markdown and it can publish the document to your Weblog that uses MetaWeblog or Wordpress APIs.
When you're done editing your Markdown text, you can simply click on the blog icon and provide some basic publish info for your entry:

You first need to set up your blog, providing the publish endpoint, username and password and name for the blog. Once configured it will show up in the list.
Weblog posts can be re-posted multiple times as the meta data associated with a post is stored as part of the Markdown at the end of the document.
You can also download existing blog posts and edit them in Markdown Monster. You can use the Weblog post browser to download and search for specific posts to download and edit, and then post them back to the site.

Note that Markdown Monster will try to parse the HTML from the existing Weblog post into Markdown, which - depending on the formatting of the HTML - may or may not result in clean Markdown for you to edit. HTML that is simple and uses simple document formatting has a good chance of getting translated, but if the HTML is full of custom tags and inline HTML markup, this HTML will show up as HTML in the document. Your mileage may vary for this feature.
Feedback
If you try out Markdown Monster and there's a problem, or you're using it and you think there's a common use case that you'd like to see, please, please let us know. We had a lengthy beta/RC period but unfortunately very little feedback in that cycle and I want to make sure that any issues are addressed.
You can post any bugs or feature suggestions on GitHub in the Issue section or you can start a more open ended discussion on our message board.
Let Markdown Monster Eat your Markdown!
Markdown Monster has become an integral part of my toolset and I use it constantly for a lot of different writing tasks. In fact, I'm writing this blog post with it right now.
Give Markdown Monster a try and see if you can't improve your writing productivity with some of its helpful features and functionality.
Chomp!
© Rick Strahl, West Wind Technologies, 2005-2016
Posted in Windows
↧
↧
.NET Standard 2.0 - Making Sense of .NET Again

At last week's .NET Connect event and two-weeks ago at the MVP Summit we got to hear about Microsoft's vision for .NET going forward. A lot of people - myself included - in recent years have wondered what the future of .NET is.
A key component in this process is .NET Standard...
It's taken Microsoft a few years of floundering and unclear messaging about the future of .NET, but it seems Microsoft is finally nailing the message for .NET going forward and .NET Standard, with its common API specification, is a huge part in making sure that the same base library functionality of .NET is available on all .NET platforms in the future.
In this post I look at what .NET Standard is, how it works and what some of the surrounding issues, impacts and benefits are for the .NET Eco system.
What is .NET Standard?
Here's my definition of what .NET Standard is:
.NET Standard is a specification, not an implementation
.NET Standard describes what a specific implementation like .NET Core, Mono, Xamarin or .NET 4.6 has to implement - at minimum - in terms of API surface in order to be compliant with a given version of .NET Standard.
The actual implementations of today's shipped .NET Standard 1.6 are .NET Core, the full .NET Framework and Mono. The current version of the standard is .NET Standard 1.6 which shipped when .NET Core 1.0 was released. Implementations can implement additional features beyond .NET Standard in their base libraries but at minimum each implementation has to implement the standard APIs of the Standard even if specific APIs end up with NotSupportedExceptions.
.NET Core as a Reference Implementation
As you might expect the API surface of .NET Standard 1.6 coincides pretty closely with the API surface of .NET Core 1.0.x and I expect that .NET Core 1.2 (or whatever the next version will be named) is likely to match very closely to what .NET Standard 2.0 specifies. In that sense it's almost like .NET Core is the reference implementation for .NET Standard at the moment. That may change in the future, but for now that's certainly holding true.
Since .NET Standard is based on full framework APIs, full framework is pretty much compatible with .NET Standard without changes, although there are a few small variations that are addressed by small update releases in .NET 4.6.1 and 4.6.2 etc.
.NET Standard corresponds to the BCL
If you're looking at .NET Standard in terms of the full version of .NET you've used for the last 15+ years, you can think of .NET Standard roughly representing the feature set of the BCL. This is the core .NET library of what used to live exclusively in mscorlib.dll and the various system dlls.
This roughly corresponds to the core .NET Base Class Library (BCL) and includes the basic type system, the runtime loading and querying operations, network and file IO, and some additional APIs like System.Data. With .NET going cross platform it's important to know that this subset has to be platform agnostic and not expect to run on any specific Operating System.
Here's a rough idea of what you can expect to see in .NET Standard 2.0:

The BCL always has been about core operating system, runtime and language services, so this OS agnostic requirement shouldn't be a huge issue. Much of the porting work that goes into moving full framework libraries to .NET Core deals with making sure that functionality works across platforms. There are lots of small issues that can trip up things like the difference in path separators between Operating Systems and the way that operating system services like threads/processes are implemented on various platforms.
Application Frameworks are not part of .NET Standard
The key thing to remember is that if you compare the full .NET Framework to what will be in .NET Standard you are only getting what is in the BCL, not what we know as the Framework Class Library (FCL). Full framework as we know it today has additional features piled on top with the FCL Libraries that sit on top of the BCL. Frameworks in this case are application platforms like ASP.NET (System.Web and OWin based), WinForms, WPF, WCF etc. For .NET Core ASP.NET 5 is an Application Framework that lives ontop of .NET Standard. These libraries are not part of .NET Standard, but they are implemented on top of it.
.NET Standard Versions
The current shipped version of .NET Standard is 1.6 and it roughly coincides with the feature set of .NET Core 1.0/1.1. The feature set in this version is fairly limited and significantly less featured than the full version of .NET and that has caused a lot grumbling in the community. Some of the missing APIs seem really arbitrary often removing overloads or extended features that just end up creating refactoring or code bracketing work.
Because many APIs and features are missing, it's been difficult to port existing libraries to .NET Core/.NET Standard as many basic features are missing. While the missing APIs can often be worked around, it's a not a trivial task to hunt down all the missing APIs in a large applications and adjust code using code bracketing (#if/#else blocks) to potentially run both in .NET Standard and full Framework applications.
Worse - knowing that .NET Standard 2.0 is on the horizon, it's very likely that those workarounds and adjustments won't be necessary in the future, so it's hard to justify putting in the effort to port now. It's no surprise that many library authors - including myself - are holding off and waiting for more API surface to port libraries to .NET Standard/.NET Core.
.NET Standard 2.0 more than doubles the API surface over v1.6, and some major missing or severely decimated APIs like Reflection and System.Data get back their original mojo. According to Microsoft's numbers .NET Standard provides a 149% increase in API surface over .NET Standard 1.6 and climbing which is quite significant! Life will be much easier.
In the end the goal is this:
Uniting .NET Implementations
.NET Standard provides a common base .NET Interface to all platforms that implement it so that no matter which version of .NET you use you'll always see at least the same base feature set.
and you should be able to use the same .NET Standard interface on any of these .NET platforms:

What about PCLs?
.NET Portable Class Libraries (PCL) had a similar goal as .NET Standard but approached this problem from a different angle. Where .NET Standard uses a fixed set up APIs to describe what comprises a .NET Standard Compliant implementation, PCLs used a union of all the common APIs that included platforms support. When building a PCL you 'check off' the platforms you want to compile the PCL for and the compiler figures out the common APIs that are supported. Effectively, the more platforms you support with a PCL the less API surface there is as each platform actually takes away features.
.NET Standard is different. It's a fixed specification - there are a set number of APIs that have to be supported by the implementation, so nothing is taken away by adding platforms. You may see unimplemented APIs (NotSupportedException) in rare cases, but the API will be there. This is a better approach by far as it gives developers a common .NET baseline that they can expect to use regardless which platform they write for.
Under the covers
So what is .NET Standard and how does that even work?
The idea is that each platform implements its specific version of APIs in the .NET Standard and then exposes a .NET Standard DLL that acts as a type forwarder. Applications directly reference only this .NET Standard DLL for each platform for BCL features, which then forwards the actual type resolutions to the actual corresponding assemblies that contain the underlying implementation.
Type forwarding works via [TypeForwardedTo] attribute that allows mapping a type in a source assembly to a type in another assembly. Essentially this allows .NET Standard to create an interface only assembly that fowards all of it's types to the underlying system assemblies used. What's nice about this is that this process is transparent and that a project can just reference the single .NET Standard Assembly that contains all the required type information, and all the details of actual assembly bindings are handled for you behind the scenes. The compiler and tooling knows which actual assemblies to reference.

If you want more detailed information on how this works you can check out this document on Microsoft's .NET Standard Rep on Github.
This removes the mess of packages/assemblies required to even get a very basic Console application up and running in .NET Core for example. Instead of having to reference 50 packages for a Hello World application as you had to before, you can simply reference .NET Standard and the tooling deals with referencing and packaging all the required dependencies at build time.
This doesn't sound much different than what we had with classic .NET where the runtimes were several monolithic DLLs, but there actually is a quite significant difference when it comes to the underlying implementation. For users the experience is similar to what we had in classic .NET where you can reference a single runtime package, but implementers get the option to separate out their underlying code into many more easily managed packages to distribute and maintain independently.
This seems like a win-win situation with the simplicity we've come to know with working with .NET for developers using the framework, and the ability to build the framework in a more modular fashion for the framework designers.
Additionally in the future it may be possible to do some tree shaking on the actual code used by your application and compile a native or dynamic binary that truly uses only those pieces of the .NET framework that is actually covered by code. There are limitations to that especially when you throw the dynamic runtime and Reflection into the mix, but it's an interesting idea to think about and something that's already happening to some degree with Universal Windows Apps which can be compiled to native binaries from .NET code.
.CSPROJ - It's baaack!!!
Yup - the .csproj project format is coming back to .NET Core.
Along with the release of .NET Standard 2.0 Microsoft is planning on going back to a .csproj based project format for .NET Core projects. Current 1.0.x .NET Core projects are using the project.json format that was introduced with .NET Core 1.0. But that format - as it turns out - is to difficult to integrate in combination with the other existing .NET platforms where .NET Standard 2.0 runs. Keep in mind that .NET Standard will apply to full .NET framework, Xamarin and Mono to mention a few, and all those existing frameworks rely on .csproj to build their binaries.
As a result Microsoft is backing off the project.jsonexperiment and going back to the more widely supported .csproj XML format, but not without making some fairly major and useful improvements. Before people start screaming about how nice project.json was - easier to read, easier to change, easier to generate - the move back to .csproj is going to bring some of the favorite features of project.json back to the .csproj format.
The main feature is that .NET Core projects now can use raw folders rather than explicitly added files in the project, so rather than adding every file you can just exclude those files that you don't want as part of the project. This reduces some of the churn traditionally seen in .csproj files and reduces source code conflicts by reordering of references. Project references are also supposed to work directly out of the XML text so you get a similar experience for adding packages in code rather than using the NuGet Package Manager. Finally project GUIDs are planned to be removed removing hard dependencies and exchanging them for pure relative path dependencies instead.
Lots left to do
It's clear that Microsoft still has a ways to go to get all of these pieces completed. As mentioned above .NET Core 1.2 (or whatever it will be called) is still under heavy development and changing rapidly and there's not even an official preview release at this point. You have to use the experimental/daily feeds to play with this.
.NET Core 1.1 and the new tooling both for the command line tools and the Visual Studio 2017 RC integration - even tough it's once again marked as RC tooling - is very rough and not anywhere near what you would have traditionally consider RC grade tools.
Visual Studio 2017 RC
Visual Studio 2017 RC contains a preview of the new .csproj based project system for .NET Core but frankly the tooling for .NET Core is a mess right now. It works to get a project to built initially but there are lots of issues in getting the project refs to update properly. This stuff is preview grade and Microsoft has said as much.
We've been in this state for a long time. Microsoft has been up front about this and the tooling does bear the Preview postfix, but man it's been over a year and still we dink around with the creaky and limited tooling that works only partially (both from the CLI and from VS). Currently you have to know way too much about the innards of the technology to be productive.
Keep in mind that if you migrate a project from project.json to the new .csproj format, it's a one way trip - you can't go back once you convert your project and you can't share your project with older versions of Visual Studio. It's possible that this will change, but so far there's no indication that .NET Core .csproj support will be backported into Visual Studio 2015.
Looks like the Visual Studio 2017 release will take us back to the bad old days of where a new version of Visual Studio is required to go along with a specific version of .NET development :-(
The Future of .NET
During the recent MVP summit I had a lot of discussions with developers and the mood I picked up is cautiously optimistic. There is a feeling that things are finally starting to turn around with .NET as a platform with a clear message of where the platform is heading. And it's taken a long time of fumbled messages to get here.
.NET Core is clearly where Microsoft is investing most of its effort right now. While it's taken a while, I think MS is proving that they are serious in making .NET the best platform it can be both in terms of performance (as the work on the TechEmpower benchmarks show) as well as combining it with the traditional developer friendly tooling that surrounds the platform. It's obviously not all there yet, but it's easy to see the direction that Microsoft is taking to make the platform as powerful as it can be.
And this approach seems to be working!
Microsoft's recent statistics show that .NET usage has been surging over the last couple of years since this open source journey started for them. Once .NET Core reaches its 1.2 status we can hope that even more people will take notice and consider .NET purely based on the merits and benefits it provides, overcoming the 'old Microsoft' prejudice that still rules entire developer communities.
On the other hand it's still an uphill battle. When I go to local JavaScript or generic Web related user groups or events, Microsoft technology isn't even a blip on the radar and in order for .NET to succeed in the long that will have to change. In these circles running server based applications on .NET or Windows (although that's no longer a requirement with .NET Core) is just not in the picture. About the only Microsoft tech I see used is Visual Studio Code which inadvertently may have turned into Microsoft's best marketing tool for brand awareness.
But if Microsoft can deliver on the promises they are making for the platform, there's a good chance that the platform will end up with a new Renaissance of developers based purely on the benefits it can provide in performance and tooling. The performance story is shaping up nicely. The tooling story is still one in the making and it's hard to say at this point whether it will provide significant benefits. Integrations like one step Docker image creation, debugging and publishing are good first steps that provide clear benefits for developers, especially those new to these new technologies.
Only time will tell though.
Much depends on how well Microsoft can present its message to the world. The key is keeping the message simple, keeping buzzwords out of it and focusing on the clear and present benefits .NET can offer in terms of performance and productivity. It's high time the marketing is focused at the hearts and minds of *developers and not management!
As far as I'm concerned Microsoft is on the right path to make that happen - just don't expect it to happen overnight... it'll take time.
Resources
post created and published with Markdown Monster
© Rick Strahl, West Wind Technologies, 2005-2016
Posted in .NET
↧
Loading .NET Assemblies out of Seperate Folders

.NET's loading of binaries is great in most standard .NET applications. Assemblies are loaded out of the application folder or a special private bin folder (like ASP.NET applications) and it all works as you would expect.
But, once you need to dynamically load assemblies and load them out of different folders things start getting pretty ugly fast. I've been to this rodeo quite a few times, and I've used different approaches and pretty much all of them are ugly. Recently when working on Markdown Monster I ran into this again and had some really odd issues and - another solution that I hadn't used before that I want to share.
Wait... Why?
Loading assemblies out of separate folders is not something you do very frequently in typical business applications. Most applications add references to their projects and the compiler and tooling handles spitting out the final required DLLs in the right folders. You take those folders and you're done.
The most common case for dynamic assembly loading involves some sort of addin mechanism where users can extend the application by creating custom components and plugging them into the current application, thereby extending the functionality.
The slippery Slope of Addins
I came to addins via my Markdown Monster Markdown Editor, which has support for addins where you can create custom extensions that extend the editor and UI. Basically it's quite easy to create a custom form that performs some task with the full Markdown document or manipulates specific text in the document - or publishes the markdown to some custom location. It seems like a natural fit for an editor - you write you want to push your document out to somewhere.
Adding addins was a very early decision when I decided to create this tool, because first of all I wanted to be able to publish my Markdown directly to my blog. And I wanted to capture images from screen shots and embed them. These two features happen to be implemented as separate addins that plug into the core Markdown Monster editor. Since then I've created a couple more (an Image to Azure Blob Storage uploader, a Gist Code embedding Addin). A few other people have also created addins.
Addin 0.1
Although I was very clear on wanting to create addins I didn't deal with all the issues of how to store the addins and get them downloaded and installed initially. My first take (Take 0.1) was to just dump all addins into an .\Addins folder and call it a day.
The application now has some startup code that checks the .DLLs in the Addins folder, checks for the addin interface and if so loads the addin.
If you're dealing with a single external folder things are easy because you can easily set the PrivateBin path which can be set in the application's app.config file:
<?xml version="1.0" encoding="utf-8" ?><configuration><runtime><assemblyBinding xmlns="urn:schemas-microsoft-com:asm.v1"><probing privatePath="Addins" /></assemblyBinding></runtime></configuration>Behind the scenes this sets the AppDomain's PrivateBin path. This also happens to be the only way to properly add the PrivateBin path for the main executable. While there is AppDomain.AppendPrivatePath() this method is obsolete and can cause some potential load order problems. It also has to be called very early on in the application likely as the first line of code before additional assemblies beyond mscorlib are loaded.
Loading Addins
In my application I actually didn't need this. Rather than dealing with Private Bin paths I've always used Appdomain.AssemblyResolve which is fired whenever an assembly cannot be resolved. If you have a single folder it's very easy to find assemblies because you know where to look for any missing references that the application can't resolve on its own.
To put this in perspective here is how addins are loaded. The original addin loader runs through all assemblies in the Addins folder and checks for the Addin interface and if found loads the assembly with Assembly.LoadFrom().
The assembly typically loads without a problem, but the problem usually comes from any dependent assemblies that get loaded when scanning the assembly for types that return or pass dependent assembly types.
private void LoadAddinClasses(string assemblyFile)
{
    Assembly asm = null;
    Type[] types = null;

    try
    {
        asm = Assembly.LoadFrom(assemblyFile);
        types = asm.GetTypes();
    }
    catch(Exception ex)
    {
        var msg = $"Unable to load add-in assembly: {Path.GetFileNameWithoutExtension(assemblyFile)}";
        mmApp.Log(msg, ex);
        return;
    }

    foreach (var type in types)
    {
        var typeList = type.FindInterfaces(AddinInterfaceFilter, typeof(IMarkdownMonsterAddin));
        if (typeList.Length > 0)
        {
            var ai = Activator.CreateInstance(type) as MarkdownMonsterAddin;
            AddIns.Add(ai);
        }
    }
}
The asm = Assembly.LoadFrom(assemblyFile); never fails by itself - loading an assembly typically works. When an assembly is loaded only that assembly is loaded and not any of its dependencies.
But, when running asm.GetTypes(); additional types and dependencies are accessed and that triggers an assembly load attempt from .NET natively. If there's no additional probing or assembly resolve the code bombs.
If you are very vigilant about not bleeding external dependencies in your public interfaces you may not see dependency exceptions here, but you will then hit them later at runtime when you actually invoke code that uses them.
.NET's assembly loading is smart and delay loads assemblies only when a method is called that uses a dependency (except ASP.NET applications which explicitly pre-load all BIN folder assemblies).
However, .NET only looks for dependencies in the startup folder or any additionally declared Private Bin paths. I don't have those, so the asm.GetTypes() in many cases causes assembly load failures.
AssemblyResolve
Luckily you can capture assembly load failures and tell .NET where to look for assemblies. A simple implementation of AssemblyResolve looks like this:
private Assembly CurrentDomain_AssemblyResolve(object sender, ResolveEventArgs args)
{
    // Ignore missing resources
    if (args.Name.Contains(".resources"))
        return null;

    // check for assemblies already loaded
    Assembly assembly = AppDomain.CurrentDomain.GetAssemblies().FirstOrDefault(a => a.FullName == args.Name);
    if (assembly != null)
        return assembly;

    // Try to load by filename - split out the filename of the full assembly name
    // and append the base path of the original assembly (ie. look in the same dir)
    string filename = args.Name.Split(',')[0] + ".dll".ToLower();

    string asmFile = Path.Combine(@".\","Addins",filename);
    try
    {
        return System.Reflection.Assembly.LoadFrom(asmFile);
    }
    catch (Exception ex)
    {
        return null;
    }
}
And to intialize you hook it up in the startup code of your application:
AppDomain.CurrentDomain.AssemblyResolve +=
               CurrentDomain_AssemblyResolve;
This is pretty straight forward and it works easily because I can look for assemblies in a known folder.
Checking already loaded Assemblies?
Notice that before going to check for assemblies out on disk, there's a check against already loaded assemblies. Huh? This sounds counter intuitive. Why would this code actually trigger and find an already loaded assembly? I dunno, but I've had this happen consistently with CookComputing.XmlRpcV2.dll which is already loaded, yet somehow ends up in the AssemblyResolve handler. Simply returning the already loaded assembly instance oddly works, which is just strange.
If the assembly is not already loaded, I can then try and load it from the .\Addins folder. With the single folder this all worked just fine.
Folder Loading
Fast forward a couple of months and now I'm looking at creating an addin manager with downloadable addins. Of course, I quickly realized that a single folder isn't going to work as each addin needs to provide some metadata and folders make it easy to see what's installed and easy to uninstall without having to track all the files.
In theory moving the code to use folders should work the same, but there's a catch - I no longer know where the assemblies are loading from specifically because there are no many addin folders.
MIA - args.RequestingAssembly
Note that the AssemblyResolve handler has a args.RequestingAssembly property which maddeningly is always blank. If this value actually gave me the requesting or calling assembly things would be easy since I could just try loading from the same folder. But alas the value is always empty, so no go.
I tried a number of different approaches in order to figure out how to get at the assembly. Different ways of loading the assembly, moving the files, AppendPrivateBin() (which as mentioned earlier has no effect after assemblies have started to load).
Using Brute Force: Scan folder hierarchy for DLLs
In the end I ended up using an extension of what worked initially which is simply to load the assembly from disk. This time around I don't know the exact folder, but I know what the base folder is so I can simply scan the directory hierarchy for the DLLs. Yes, this definitely has some overhead, but after all the false starts this just seems to be the most reliable way to ensure assemblies are found and matched.
So now instead of hardcoding the assembly path I use this routine and reference it in AssemblyResolve to find my assembly:
private string FindFileInPath(string filename, string path)
{
    filename = filename.ToLower();

    foreach (var fullFile in Directory.GetFiles(path))
    {
        var file = Path.GetFileName(fullFile).ToLower();
        if (file == filename)
            return fullFile;

    }
    foreach (var dir in Directory.GetDirectories(path))
    {
        var file = FindFileInPath(filename, dir);
        if (!string.IsNullOrEmpty(file))
            return file;
    }

    return null;
}
Which is then called in AssemblyResolve like this:
string asmFile = FindFileInPath(filename, ".\\Addins");
if (!string.IsNullOrEmpty(asmFile))
{
    try
    {
        return Assembly.LoadFrom(asmFile);
    }
    catch
    {
        return null;
    }
}

// FAIL - not found
return null;
This works with everything I've thrown at it thus far so this seems like a good solution. There's definitely some overhead in this - both searching for the assemblies and then also from all the assembly preloading that occurs because of the type scanning in order to find the addin interface - which effectively preloads all used dependencies.
Asynchronous Addin Loading
In order to minimize the overhead of this addin loading, I also load addins asynchronously, so they happen in the background while the rest of the application loads.
protected override void OnStartup(StartupEventArgs e)
{
    // force startup directory in case we started from command line
    var dir = Assembly.GetExecutingAssembly().Location;
    Directory.SetCurrentDirectory(Path.GetDirectoryName(dir));

    mmApp.SetTheme(mmApp.Configuration.ApplicationTheme,
                   App.Current.MainWindow as MetroWindow);

    new TaskFactory().StartNew(() =>
    {
        ComputerInfo.EnsureBrowserEmulationEnabled("MarkdownMonster.exe");

        try
        {
            AddinManager.Current.LoadAddins();
            AddinManager.Current.RaiseOnApplicationStart();
        }
        catch (Exception ex)
        {
            mmApp.Log("Addin loading failed", ex);
        }
    });
}
and this seems to help to mitigate the startup lag quite a bit.
AppDomains
No discussion of Add ins and assembly loading would be complete without mentioning AppDomains and loading Addins separately. A lot of the issues I've described here could be mitigated by using a custom AppDomain and explicitly setting up the private bin path before load time by pre-scanning the folders.
There are a some clear advantages to using AppDomains:
- Ability to load and unload addins dynamically
- Better control of Assembly resolving
- Better Isolation from the main application
But after having struggled with AppDomain based addins in a couple of other applications and realizing that add-ins need to have access to the WPF UI, there's no easy way to deal with the cross domain serialization in such a tighly integrated addin. Although possible, the complexities that this raises are not worth the effort.
Along the same lines app Isolation is not a concern since addins have to have tight integration with the main application anyway in order to do what they need to. So addins run in-process.
It all depends on the solution used of course. More business service centric addins can be a good fit for AppDomain.
Summary
This may sound like a fairly esoteric problem, but while searching for solutions around not getting Assembly resolve errors and loading of assemblies from multiple folders, there are a lot of people running into these same problems. There are a lot of hacky workarounds and this one is just one more in a long line of hacks. But for me at least this one has been reliably working - in fact so much so I've retrofitted it to two other applications that were previously guessing at paths.
Hopefully this will prove useful to some of you, but as always it helps me to write this down so I can find this for the inevitable next I build some add in based interface and will have forgotten what worked - it's one of those things you do so seldom that it's easy to forget...
If you want to see all the pieces together in a working application you can check out the links below in the Markdown Monster source code on Github.
Resources
this post created with Markdown Monster
© Rick Strahl, West Wind Technologies, 2005-2016
Posted in .NET
↧
WPF Rendering DUCE.Channel Crashes due to Image Loading

I ran into a nasty problem yesterday with Markdown Monster that was causing the application to first hang and then hard crash. But it only happened on a very few machines running the application.
On my desktop development machine everything's fine. My Windows 7 VM I use for testing also works fine. But I ran into the failure when doing a quick run test on my Windows 2012 R2 server which I connect to over RDP and sometimes test my applications.
Looking at my bug report logs I see these lovely messages:

Yikes! no hint of user code, no idea what that means.
12/13/2016 10:32:44 AM - Insufficient memory to continue the execution of the program.
Insufficient memory to continue the execution of the program.
Markdown Monster v1.0.25
6.3.9600.17328.amd64fre.winblue_r3.140827-1500 - en-GB
128.74.213.13
---
PresentationCore

   at System.Windows.Media.Composition.DUCE.Channel.SyncFlush()
   at System.Windows.Interop.HwndTarget.UpdateWindowSettings(Boolean enableRenderTarget, Nullable`1 channelSet)
   at System.Windows.Interop.HwndTarget.UpdateWindowPos(IntPtr lParam)
   at System.Windows.Interop.HwndTarget.HandleMessage(WindowMessage msg, IntPtr wparam, IntPtr lparam)
   at System.Windows.Interop.HwndSource.HwndTargetFilterMessage(IntPtr hwnd, Int32 msg, IntPtr wParam, IntPtr lParam, Boolean& handled)
   at MS.Win32.HwndWrapper.WndProc(IntPtr hwnd, Int32 msg, IntPtr wParam, IntPtr lParam, Boolean& handled)
   at MS.Win32.HwndSubclass.DispatcherCallbackOperation(Object o)
   at System.Windows.Threading.ExceptionWrapper.InternalRealCall(Delegate callback, Object args, Int32 numArgs)
   at System.Windows.Threading.ExceptionWrapper.TryCatchWhen(Object source, Delegate callback, Object args, Int32 numArgs, Delegate catchHandler)
---------------------------------------System.Windows.Media.Composition.DUCE.Channel??? The error manifests as a hard crash that occurs right before the form starts rendering (apparently) and when it happens the app tries to recover and restart and then run repeatedly into the same error which eventually runs out of memory and crashes.
The insidious problem with this failure is that there's no effective way to capture the error because it occurs as part of the WPF rendering pipeline.
As you can see in the call stack there's none of my application code to catch any failures and the error falls back and is captured by the application wide App.DispatcherUnhandledException, which is where the error logging and bug reporting occurs that allows me to see the error at all. This is the error handler of last resort and on recoverable errors the handler simply restarts the application, but in this case the failure is total because another restart just fires into the same failure over and over again (which accounts for the hanging) and eventually the process just runs out of memory and crashes hard.
Hardware Errors
A bit of research in the DUCE.Channel errors reveals that it's usually related to a video hardware driver issues, which makes sense since the problem apparently only affects a small number of machines. Unfortunately information is scarce and basically boils down to make sure you have the latest video drivers.
Er, sure that makes sense, but that's not very useful if you have an application that's going out to a lot of generic hardware of all kinds - I have no control over what hardware is used with MM, and I knew this app was running without issue a couple of days ago on the same hardware it now fails on.
Discovery
My lucky break on this was that I happened to notice the failure right away on my server. I infrequently install and run the application on my server just to see if it works. Server UIs - with the non-fancy windows theme and slow RDP connection have a way of bringing out errors so that's a good final 'reality check'. I don't do it all the time, but in this case luckily I did.
If I wouldn't have tested on my server I would have never noticed the errors because the code was running fine on the two machines I regularly test with.
Also luckily for me, I knew that I had a running build a couple of revs back. I saw errors on build 1.0.25 but I knew 1.0.22 (which was the previous release version) worked fine on the same hardware.
So something in between these two builds was causing the failure which was a huge help in the end as I could run a meaningful code compare.
So I pulled down the known working version (1.0.22) from Git, slapped it into a separate folder and used Beyond Compare to see everything that had changed. while While not a lot had changed it was still enough to make this non-trivial that ended up eating up a few hours of trial and error re-installs on the server.
I tried a lot of dead ends before I found the solution here and I'm not going to bore you with those false leads which involved removing a bunch of code, inserting logging statements into the page and compiling and updating the server executable a hundred times or more. Yechh!!! All of that convinced me that the page startup code was loading fine, but failing right at the render stage just before anything became visible, which points at a render failure.
Image Breakdown
I should have probably look there sooner, but I found the problem in the main window's XAML file.
It turns out that the problem was the icon image for the Page - a PNG file that I had changed recently from a 256x256px image to a 128x128px image:
<controls:MetroWindow x:Class="MarkdownMonster.MainWindow"
        ...
        Icon="Assets\MarkdownMonster_Icon_128.png"
/>
In between the two versions I had switched to a new, smaller 128px icon file, and also had run some additional image compression on the file.
It turns out the 128px image was the culprit in the failure. Using the 128px image caused a load failure every time on the server, but works fine on my dev box and the Win7 server.
Switching back to the old 256px image the application started working properly again on all machines. So it looks like it's something in the image that's causing WPF to barf.
I'm not sure exactly what the issue is and why this particular image blows up like this, but it's clear that WPF is having problems rendering the PNG file icon. My guess is there's something in the PNG parser that happens to have a problem on some video hardware.
Summary
The moral of the story is that the problem here lies with WPF and when you see rendering errors, the first thing you should check for are resource related issues. In my (somewhat limited) experience with WPF, most oddball load failures in WPF applications come from something related to resources either not being found or not loading properly. The errors that occur in these scenarios are almost always cryptic and nearly indecipherable.
It helps to have a good back or source control commit that you can roll back to so you can compare what's changed between the two versions. If you run in the error I describe above look for asset or resource related changes first before going down any code debugging path (which is what I did, wasting hours on several dead ends).
It's also pretty sad that WPF fails in this way. An image loading failure causes the application to hang and without a error message that points you anywhere useful - that's terrible behavior and something the WPF team should look at fixing. There has to be a way for WPF's rendering engine to capture the error and provide a more meaningful error message. Clearly WPF is able to report the error, so there should be some state that can be recovered and reported. ANYTHING at all - a file, a hint a sign from god - i don't know anything would have been better than the actual error message.
Hopefully this post provides some additional feedback for those that run into these errors. I'm sure there are many causes for this same error and the image rendering one might just be one of the symptoms that triggers it.
© Rick Strahl, West Wind Technologies, 2005-2016
↧
Visual Studio Debugging and 64 Bit .NET Applications

I've been working on Markdown Monster which is a 64 bit application. I found out the hard way today that when you fire up the debugger in Visual Studio it will launch in 32 bit mode by default even if the application would run 64 bit when run directly. In the process I discovered quite a few things of the debugger I wasn't aware of along with a few suggestions from Kirill Osenkov that were illuminating and that I'll share here.
32 Bit Debugger for 64 Bit Process?
Before we get into this I want to clarify that in most cases it's probably OK to be debugging in 32 bit mode when running what otherwise is a 64 bit application. One of the beauties of a runtime environment like .NET is that it for the most part doesn't have to care what CPU platform you're running under. The framework masks most of those differences for us. If you don't think that's cool, you probably haven't done low level C/C++ style programming before and don't know how much of a pain dealing with bitness can be! That it's so easy in .NET is actually big deal.
32 bit/64 bit issues usually come up in relation to OS features and locations that are different. I ran into the 32 bit issue while debugging some start up configuration check logic in Markdown Monster. MM requires a few file and system registry settings in order to work properly - specifically IE 10/11 browser emulation and an optional path check - in order to work properly. The application checks whether certain values have been set and if not attempts to set them.
As you probably know, system folders and registry paths can vary depending on whether you are running 32 bit or 64 bit. Folders in particular can be different. So one thing MM does is add the Markdown Monster install path to User's path so that you can type mm Readme.md or mm data.json or mm web.config (MM supports editing a few common text formats besides Markdown) to view the document in the editor.
Specifically I am using this code to retrieve the program files folder install path in my app:
 string mmFolder = Path.Combine(
       Environment.GetFolderPath(Environment.SpecialFolder.ProgramFiles),"Markdown Monster");
which when running on a 64 bit machine should return (or whatever localized version thereof):
c:\Program Files\Markdown Monster
And it does at runtime when running the EXE directly from explorer or the command line.
However, when running under the debugger in Visual Studio I'm getting:

c:\program files (x86)\Markdown Monster
which clearly is a 32 bit path on a 64 bit system. Both are the same Any Cpu Visual Studio target as the runtime application, but very different results.
Uncheck prefer 32 bit
The key setting that affects the debugger behavior is the Prefer 32 bit flag which should be disabled if you want to run in 64 bit mode using Any CPU.

If you're running the 'raw' debugger against your process that's all that needs to happen to ensure your app runs as you'd expect it to run from Explorer or the command window.
Even more straight forward though is to force the debug application entirely to 64bit by changing the platform target to x64:

Note that neither of these settings are debugger related - they affect whatever build mode (Release/Debug) that you apply it to at runtime, no matter what.
VSHOST: We don't need you
But wait there's more.
Visual Studio also uses a VSHOST process for debugging your standalone EXE applications. The VsHost process acts as a wrapper around the actual application or assembly you are debugging. When Debugging an EXE style application, by default Visual Studio runs the application in the yourapplication.vshost.exe

This EXE is a small stub loader that actually loads your main assembly (in the EXE) into the default AppDomain of the host and then calls the [Main] function on it. For the most part the behavior between native and hosted are the same but there are a few differences.
One of them is that the host process will default and stick to 32 bit even if the Prefer 32 bit option is not checked. The only way I could get the host process to work in 64 bit is to explicitly change my project build target to x64 instead of Any CPU which is silly.
After a lengthy Twitter conversation with Kirill Osenkeov from the Visual Studio team, I walked away with the impression that it's best to turn off the VSHost Debugging features in most cases:

As Kirill mentions, the host container is a throw back to older Visual Studio days, and there's actually very little functionality it provides to the debugging process, so you are better off not using it at all unless you need the specific features it provides.
To turn it off use the Debug tab on the Project Settings and uncheck Enable the Visual Studio hosting process.

FWIW I'm glad I found out about the non-need for the VSHost process as that's caused me all sorts of grief with locked assemblies in the past. I gladly bypass this extra step.
Summary
Now with both Prefer 32 bit and Enable the Visual Studio hosting process off, debugging works as expected in 64 bit mode.
In most cases the differences between 32 bit and 64 bit are not important in your applications, but regardless I think it's a good idea to ensure that you are debugging in the same environment you're expecting to run the application in. It's easy to overlook some odd behavior that only occurs due to the OS differences. My case of checking for the Program Files is just one example of that. It took me a while to figure out why the application was not updating the path the way I was expecting to. Especially if you are dealing with the file system and special folder paths, or the registry be very sure that you're getting data to and from the right places.
© Rick Strahl, West Wind Technologies, 2005-2016
Posted in .NET Visual Studio
↧
↧
Downgrading a .NET Applications from 64 bit to 32 bit for the WebBrowser Control
If you're like most developers these days, when you build a Windows desktop or Console application you most likely use the default Any CPU target in Visual Studio to build your application:

What Any CPU does is essentially build your binary so it can execute either in 64 bit or 32 bit. If you launch an EXE created with Any CPU on a 64 bit machine the app will run 64 bit, and will run 32 bit on a 32 bit platform of Windows.
Most of the time this is exactly what you want and it should be your default for most applications.
But, most of the time is not all the time and of course I wouldn't be writing this post if Mr. Murphy wouldn't have kicked my ass on something yet again. In this post I describe how Markdown Monster which started out as a 64 bit application ended up getting downgraded to 32 bit and as a result ended up running much more smoothly and reliably. While it's a special case mostly due to the heavy interaction with several WebBrowser controls, it's still something to keep in mind when you're building desktop applications for Windows.
64 bit vs 32 bit
Before I get into my application specific issues let's look at advantages and disadvantages of each of the bitness platforms.
These days most of us run 64 bit versions of Windows, so it makes sense to run our applications in 64 bit as well. Or does it? When you open your Task Manager in Windows you're likely to find that a large percentage of the applications you run all day long are actually 32 bit. Take a look at my Task Manager right now:

OK, there are other apps like iTunes, Paint.NET, Fiddler, Beyond Compare, Adobe products, Nitro that I use often and that are 64 bit, but the fact remains: 32 bit for desktop applications is not uncommon and not what you should think of as legacy. 32 bit isn't going away anytime soon because a large percentage of Windows apps we all use are running 32 bit.
64 bit and 32 bit in .NET
If you build .NET applications you can easily choose between 32 bit and 64 bit compilation modes, or even better you can have the application auto-detect which OS it's running under and use 64 bit or 32 bit depending on the OS bitness. .NET makes it easy to either create pure 64 bit applications or a mixed mode application that can run either in 64 bit or 32 bit mode depending on the OS Bitness that launched it. Most of the time I'd recommend going with the Any CPU build target which provides this auto-detect operation of the final executable.
64 bit offers a much bigger memory virtual address space (8 TB in theory!) and in theory 64 bit is the native platform so it should be faster. It offers larger 64 bit registers and these can perform some operations in a single operation that requires multiple ops on 32 bit registers due to the register size and improved instruction set. For computationally intensive applications - and especially those dealing with integer or bit math, performance can be considerably improved with 64 bit (up to 2x in theory in reality much less).
In reality, few desktop or Windows Console applications need more than the ~1.5gb effective address space a 32 bit app can address, and I've yet to see any significant performance improvement from a 64 bit app over a 32 bit app in typical desktop or business applications.
I have however seen many occasions where the opposite is true, where 32 bit applications are much more snappy than the 64 bit equivalent. And - as it turns out that's true for my Markdown Monster application.
Running into 64 bit issues with the WebBrowser Control
I've been working on Markdown Monster which is a Windows WPF application, that extensively uses Interop to interact with a number of Web Browser control instances. The application initially was built using Any CPU which means it was running as 64 bit application for anybody running on a 64 bit OS.
Making the WebBrowser control behave is tricky business all by itself, but after beating the feature functionality into submission, I noticed that there were occasional and very mysterious hard crashes that would bring the application down. The same operations would randomly fail - sometimes just opening a certain file, sometimes updating an preview. Checking event log data shows non-descript crashes in jscript.dll which is the IE Javascript engine. Markdown Monster uses a lot of Javascript - the editor (Ace Editor) is a huge Javascript library that manages the entire editing experience via js script code and the previewer uses a bunch of custom script to manage the preview syncing between the editor and preview windows, with the .NET Application in the middle as a proxy.
It wasn't just me either - a number of users reported some of these mysterious crashing issues on GitHub, often with repeatable steps that wouldn't repeat consistently. Open a specific file and it would fail 1 out of 10 times even immediately after startup going through the same steps. Argh! Those are the worst issues to debug.
Debugging and 64 Bit
A few days ago I posted about some 64 bit debugger problems I ran into while debugging my application and while trying to track down some 32 bit vs. 64 bit issues.
I realized that I was seeing drastically different behavior between the version being debugged and the version I run standalone. A number of interactions between the WPF application the HTML preview or the editor would fail in the production version which runs 64 bit, but it always worked just fine in the debugger running 32 bit - the problem wouldn't duplicate. Initially I attributed that to the fact the app was running under the debugger but after realizing that the debugger was running 32 bit I actually tried running the app in 32 bit.
32 bit Surprise
To my surprise I found that the odd failures I saw in 64 bit - mostly browser interaction related issues in the preview pane - did not occur in the 32 bit version even when not debugging. Things just worked as they were supposed to without the occasional odd failures. The WPF app captures the DOM document and then initializes Interop by passing a .NET reference to the Javascript code, and that code would occasionally and somewhat randomly fail in 64 bit - in 32 bit that code never fails.
Specifically this code:
PreviewBrowser.LoadCompleted += (sender, e) =>
{
    bool shouldScrollToEditor = PreviewBrowser.Tag != null && PreviewBrowser.Tag == "EDITORSCROLL";
    PreviewBrowser.Tag = null;

    dynamic window = null;
    MarkdownDocumentEditor editor = null;
    try
    {
        editor = GetActiveMarkdownEditor();

        dynamic dom = PreviewBrowser.Document;
        window = dom.parentWindow;
        dom.documentElement.scrollTop = editor.MarkdownDocument.LastBrowserScrollPosition;

        // *** THIS FREQUENTLY FAILS IN 64BIT NOT 32BIT
        window.initializeinterop(editor);

        if (shouldScrollToEditor)
        {
            try
            {
                // scroll preview to selected line
                if (mmApp.Configuration.PreviewSyncMode == PreviewSyncMode.EditorAndPreview ||
                    mmApp.Configuration.PreviewSyncMode == PreviewSyncMode.EditorToPreview)
                {
                    int lineno = editor.GetLineNumber();
                    if (lineno > -1)
                        window.scrollToPragmaLine(lineno);
                }
            }
            catch
            { /* ignore scroll error */ }
        }
    }
    catch
    {
        // try again
        Task.Delay(200).ContinueWith(t =>
        {
            try
            {
                // *** STILL FAILS IN 64BIT (ie. not a timing error)
                window.initializeinterop(editor);
            }
            catch (Exception ex)
            {
                mmApp.Log("Preview InitializeInterop failed", ex);
            }
        });
    }
};
In 64 bit the code would frequently, but not always fail while trying to call the initializeinterop() function - which is a global Javascript function in the preview document. The error states that initializeinterop is not found, which is crazy - the document loads and that function is available. Script code is loaded before doc content so the function is always there. Yet in 64 bit I frequently got errors that fired into the exception handler (which would also fail on the delayed retry).
In 32 bit - the exception handler is never triggered. Reviewing my telemetry logs confirms that end users also very frequently see errors with this same issue on 64 bit. With the 32 bit version in circulation those errors have stopped coming in.
In addition to these odd load issues no longer triggering, I also noticed that the editor control was behaving much more smoothly in 32 bit. Text entry is much smoother and the inline preview refreshes that update the preview HTML go much quicker and without affecting the editor's cursor while updating - previously in 64 bit mode a spinning busy cursor would briefly appear.
In theory 64 bit and 32 bit should behave the same, but clearly in this case the reality is that 32 bit and 64 bit have quite different behaviors.
Internet Explorer and 64 Bit
It's pretty obvious that most of the undesired behavior can be traced back to the WebBrowser control. And the Web Browser control is based on Internet Explorer 11 using FEATURE_BROWSER_EMULATION.
Internet Explorer is a tricky beast when it comes to 64 bit and 32 bit operation. IE runs the standalone browser shell as a 64 bit Windows process, but loads all browsing instance windows into their own 32 bit process.
With 3 tabs open here's what the IE processes in Task Manager look like:

Notice there's one 64 bit process and three 32 bit processes which presumably belong to each one of the tabs. So even Windows itself is only using the 64 bit host process and then uses 32 bit sub-processes to handle the actual browser tab display. Maybe Microsoft knows something they are not telling us here but it looks like they too prefer to run actual browser content in 32 bit.
WebBrowser Controls
The WebBrowser control in WPF (and also WinForms) is a COM wrapper around the the hostable IE engine and it comes in both 64 bit and 32 bit flavors as you can use the WebBrowser control for either type of application. However in several applications that I've built with the WebBrowser control there are odd issues with the control in 64 bit that never show up in 32 bit. I had forgotten about similar issues that I ran into with West Wind Web Surge which also uses the WebBrowser control to display load test results.
Also I've noticed that the performance of the application - or maybe more specifically the Web Browser controls running inside of the Markdown Monster application are noticeably more responsive. This is very noticeable while typing in the editor (remember: it's Javascript in a WebBrowser control) and also in the Markdown Monster preview browser that displays the render HTML output from the edited Markdown text. The preview now updates in the background without a funky refresh cursor (pointer with a spinning wheel) showing up on top of the application which happened previously, but is now mysteriously gone. This might just be because the refresh is drastically faster or because there's less blocking code that allows the refresh to occur in the background.
As I mentioned earlier the bug report telemetry bears this out - with several dozen users updated to the 32 bit version running 1.0.30 the various browser initialization errors in the error logs fort that version have stopped while I still see quite a few for older versions.
Downgrading to 32 Bit
So to actually downgrade an application that you want to explicitly run in 32 bit mode you should set the build target to x86 in the Visual Studio build dialog:

I prefer this setting because it's explicit and sets up the application to run 32 bit only.
The other option is to use the Any CPU and Prefer 32 bit option:

This produces a 64 and 32 bit capable binary that will run 32 bit if launched on an OS that supports 32 bit operation. In reality this has roughly the same effect as the x86 flag since there are no pure 64 bit OS at the moment.
I prefer the first option because it is explicit, and if you install your application you likely will have to choose where it installs (Program Files or Program Files (x86)) if you're trying to run in 32 bit mode. Either works and does the trick.
Summary
I want to be very clear and say that this is not meant to be a post that says - "Don't use 64 bit mode". For most types of applications, running with Any CPU and running in 64 bit works just fine.
But if you are running applications that deal with the WebBrowser control and you see lots of unexpected hard crashes or DOM access failures you might want to experiment to see if running in 32 bit mode improves on the undesired behaviors. It looks very much like the WebBrowser control like Internet Explorer in general prefers running in 32 bit mode and comparing the older 64 bit version to the newer 32 bit version of Markdown Monster certainly bears that out for me. It's nice to get the improved 'snappiness' and to not see the occasional oddball I (and others) had previously been seeing.
In Markdown Monster the switch to 32 bit from 64 bit is like night and day for application performance and stability, so to me this was a huge win. But again this is a special case because this app relies so heavily on the WebBrowser control. Your mileage may vary but I think this is still a good data point to consider if your 64 bit application runs into 'odd' behavior.
Put this one into the 'good to know' category...
post created with Markdown Monster
© Rick Strahl, West Wind Technologies, 2005-2016
↧
Back to Basics: String Interpolation in C#

One of my favorite features of C# 6.0 - which has been out for a while now - is String Interpolation. String Interpolation is a fancy name for compiler based string templates that allow you to embed expression values into literal strings with the compiler expanding the embedded values into the string using the $ operator:
var msg = $".NET Version: {Environment.Version}"
// .NET Version: 4.0.30319.42000
You can think of String Interpolation of compiler sugar around the string.Format() function for string literals, although there are some differences between how you use String Interpolation and string.Format() that I describe later in this post.
String Interpolation - Inline Template Literals
String Interpolation is like an inlined, much more readable version of string.Format(). Rather than using string.Format() with {0}, {1} etc. for value embedding, you can use {varNameOrExpression} directly inside of the string content.
To demonstrate let's look at creating an embedded string using string.Format() first. I'm using LinqPad here and you can find these examples in a Gist on GitHub:
string.Format()
string name = "Rick";
int accesses = 10;
string output = string.Format("{0}, you've been here {1:n0} times.",
                              name, accesses);
output.Dump();
The same code written using C# 6.0 string interpolation looks like this:
String Interpolation
string name = "Rick";
int accesses = 10;
string output = $"{name}, you've been here {accesses:n0} times.";
output.Dump();
Both produce:
Rick, you've been here 10 times.
Notice that like String.Format() the expressions you use can provide a format expression, which is the same value you would use in a .ToString("n0") function.
The second example is much more readable, especially if you have a few expressions that you're pushing into a string. You don't have to worry about order as you can simply embed any valid and in-scope C# expression into the string template.
{Expressions} can be any valid C# expression.
The following is simple math expression:
int x = 20;
int y = 15
string = $"Adding {x} + {y} equals {x + y}"
You can also use object properties and call methods on objects. The following uses the DateTime and Exception objects:
catch(Exception ex)
{
    mmApp.Log($"{DateTime.UtcNow.ToString("dd-MM-yyyy HH:mm:ss")} - DOM Doccument update failed: {ex.Message}",ex);
}
Note I'm using .ToString() explicitly in the code above to demonstrate that you can use a method, but really you can use the formatting expression syntax:
$"Time: {DateTime.UtcNow:dd-MM-yyyy HH:mm:ss}"You can use object properties and methods just as easily as local variables declared inside of the current method. Any valid C# expression that's in scope is usable for an expression.
Multiline
String templates also work across multiple lines so you can expand text into a verbatim string literal prefixed with the @:
// parameterized values
DateTime releaseDate = DateTime.Now.Date;
decimal version = 1.01M;
string newStuff = @"
* Fixed blah
* Updated foo
* Refactored stuff";

// actual string literal
string message = $@"Version {version} of Markdown Monster is now available.

Released on: {releaseDate:MMM dd, yyyy}
{newStuff}
";

message.Dump();
Which produces:
Version 1.01 of Markdown Monster is now available.
  Released on: Dec 26, 2016
  * Fixed blah
  * Updated foo
  * Refactored stuff
The combination of multi line literals and embedded string expressions make for a much more readable experience when dealing with long strings. This is useful for message dialogs, log entries and any other situations where you need to write out larger blocks of text with embedded values.
Interpolated Strings are not a Template Solution
At first blush interpolated strings look like an easy way to create string templates that evaluate expressions. But it's important to understand that String Interpolation in C# is merely compiler generated syntactic sugar that dynamically generates string.Format() code with compile time expressions that are parameterized. The format string has to be a static string literal.
The String literals part is important: You can't load an Interpolated Format String string like "Hello {name}" from a file and 'evaluate' that. Would be nice if that worked, but no cigar...
This means that unlike string.Format() which does let you explicitly specify a format string at runtime, string interpolation requires that the format string is a static string literal in your source code.
Interpolated Strings must be Static String Literals
Interpolated strings have to exist in their entirety at compile time as string literals, and all the expressions embedded in the string must be properly in scope in order for the compiler to embed them into the generated code. Otherwise a compiler error is generated.
What this means is that you can't parameterize the format string with String Interpolation. This does not work:
var format = "Time is {DateTime.Now}";
Console.WriteLine($format);
But you can parameterize the format string when using string.Format(). This does work:
var format = "Time is {0}";
Console.WriteLine(String.Format(format, DateTime.Now));
Looking at the IL Code
To understand how this works you can look at the generated IL code on an Interpolated string.
Let's look at the first example again:
string name = "Rick";
int accesses = 10;
string output = $"{name}, you've been here {accesses:n0} times.";
output.Dump();
which turns into this IL code (as decompiled by LinqPad):
IL_0000:  nop
IL_0001:  ldstr       "Rick"
IL_0006:  stloc.0     // name
IL_0007:  ldc.i4.s    0A
IL_0009:  stloc.1     // accesses
IL_000A:  ldstr       "{0}, you've been here {1:n0} times."
IL_000F:  ldloc.0     // name
IL_0010:  ldloc.1     // accesses
IL_0011:  box         System.Int32
IL_0016:  call        System.String.Format
IL_001B:  stloc.2     // output
IL_001C:  ldloc.2     // output
IL_001D:  call        LINQPad.Extensions.Dump<String>
IL_0022:  pop
IL_0023:  ret
You can see how the compiler is turning our Interpolated String literal into a string.Format() method call.
The local values to be embedded are effectively embedded.
This code that uses an exception object:
public void Log(Exception ex)
{
 	string val = $"{DateTime.UtcNow.ToString("dd-MM-yyyy HH:mm:ss")} - DOM Doccument update failed: {ex.Message}";
	val.Dump();
}
turns into:
IL_0000:  nop
IL_0001:  ldstr       "{0} - DOM Doccument update failed: {1}"
IL_0006:  call        System.DateTime.get_UtcNow
IL_000B:  stloc.1
IL_000C:  ldloca.s    01
IL_000E:  ldstr       "dd-MM-yyyy HH:mm:ss"
IL_0013:  call        System.DateTime.ToString
IL_0018:  ldarg.1
IL_0019:  callvirt    System.Exception.get_Message
IL_001E:  call        System.String.Format
IL_0023:  stloc.0     // val
IL_0024:  ldloc.0     // val
IL_0025:  call        LINQPad.Extensions.Dump<String>
IL_002A:  pop
IL_002B:  ret
It's a neat trick, but it clearly demonstrates that you can't dynamically load a string with expressions and expect to evaluate the string. The code is generated at compile time and hard codes the expressions in the string into the compiled code which means the expressions are fixed at runtime.
Effectively this means you can use this feature only for inlining expressions into literal strings.
Performance
As you can see by the IL generated, the compiler generates string.Format() code. There's a tiny bit of overhead for the explicit variable embedding but the overhead is very, very small. Running a comparison of string.Format() versus produced almost identical perf results with less than 1% of overhead and we're talking about a million repetitions in less than a half a second.
But this is micro optimization at best. If performance is that important to you then you shouldn't be using string.Format() at all and just stick with String.Concat(), the + operator, or StringBuilder which all are slightly faster.
Where can you use it?
You can use String Interpolation with C# 6.0, and any post 4.5 version of .NET assuming you are using the C# 6 or later Roslyn compiler. Although Roslyn can compile down to .NET 4, String Interpolation relies on newer features of the framework to work properly - specifically FormattableString. You can still use this feature in older versions by poly filling the missing methods. Thanks to Thomas Levesque for pointing this out in the comments.
Summary
String Interpolation is a great way to make code more readable, but keep in mind that it's not a runtime templating solution as you can't read a format string into memory and then evaluate it - that's not possible using the String Interpolation syntax. This is purely a compiler feature that makes inlined string literals in your code more readable and maintainable.
Out of the feature set in C# 6 this feature (and the null propagation operator) is the one I probably use the most. I find I constantly use it for notification messages (status, message boxes, task notifications) and logging messages. It sure beats writing out verbose string.Format() commands.
What do you use String Interpolation for? Chime in in the comments.
Resources
post created with Markdown Monster
© Rick Strahl, West Wind Technologies, 2005-2016
↧
Faking out the .NET Runtime Version

I've been struggling with a high DPI problem in Markdown Monster as it relates to the built-in screen capture functionality. In a nutshell, if running a second (or third) monitor that is using High DPI scaling, the screen capture selection mechanism fails to properly select desktop windows. WPF doesn't understand multi-monitor DPI scaling so it uses the first monitor's DPI setting for mapping screen locations which causes the screen capture highlight windows to be off by a given ratio. There are ways to figure out the right ratios, and manually force WPF into multi-monitor DPI mode, but there are other issues that make this very difficult (involving a bunch of native code) to solve on .NET 4.6.1 and earlier.
The good news is that .NET 4.6.2 introduces some new runtime features that make WPF multi-monitor scale aware and provides system metrics correctly on multiple, scaled displays. First shot running on 4.6.2 proves the basic code that works on a single monitor, now also works on secondary monitors. Yay!
Problem solved right?
.NET Runtime Adoption
Not so fast. The current version of Markdown Monster runs against .NET 4.5.2 which is typically my go to version of .NET that I use for destop/console applications. It's been out for a long time and available on just about any machine that runs at least .NET. 4.5 was released with Windows 7 and 4.5.2 was released as part of one of the follow up releases. In short - you can pretty much assume 4.5.2 is always there on Windows 7 or better machines which is all that Markdown Monster supports anyway. For the few others - well, let them download a later version.
There have been very few API changes in later versions, although there have been some nice runtime enhancements (new 64 bit compiler, better garbage collector, improved memory management, DPI management improvements - all in 4.6) but really these features are all pretty minor.
Until last week 4.6 and the new features were all "Meh!" to me. Until I needed a feature in the new version - 4.6.2.
Particularily this feature:
Per-Monitor DPI Support
WPF applications are now enabled for per-monitor DPI awareness. This improvement is critical for scenarios where multiple displays of varying DPI level are attached to a single machine. As all or part of a WPF application is transitioned between monitors, the expected behavior is for WPF to automatically match the DPI of the app to the screen. It now does.
In previous versions, you would have to write additional native code to enable per-monitor DPI awareness in WPF applications.
Ok, so now it's time to ship 4.6.2, right? Done and done!
Uh, no not quite. 4.6.2 is relatively new and a lot less people are running 4.6.2 compared to 4.5.2 or even 4.6.1 which means people have to deal with downloads of the .NET Runtime when launching for the first time:

Ack! Not what I want to see, especially when I'm running an application I just installed for the first time.
This is what you see when you try to run Markdown Monster on one of my test VM machines that has only 4.6.1 installed. Not only that but I actually found out that even my dev machine, which usually is pretty much up to date with Insider builds and various beta software also didn't have .NET 4.6.2 installed. Saaaay whaaaaat? I was as surprised as you might be :-)
So requiring 4.6.2 would come with some pain for users that I'd rather not imbue upon them.
So, now what?
A quick review of .NET 4.0 Runtimes
When .NET 4.0 was released and the subsequent .NET 4.5 and 4.6 releases, .NET changed direction when it came to version updates.
All .NET 4.x.x Runtime updates are in-place updates replacing older versions of the runtimes.
This means when you install a new version of .NET 4.x.x you replace whatever previous version of .NET 4.x.x you had previously installed. On a system that runs 4.6.2 you can run applications that require 4.0, 4.5, 4.5.1, 4.5.2, 4.6 and 4.6.1 - 4.6.2 supersedes all these previous versions and replaces all previous ones. A machine that 4.5.2 installed can run all 4.x versions and up to 4.5.2 and so on.
It's debatable whether this is a good idea or not, but it does make it easy to stay up to date. When a new version comes around you can simply update and get all the features of the new runtime. All your old apps requiring older versions continue to run. New apps that want to use latest also work. And as a benefit, you also get the benefits of internal fixes and optimizations even if your app is targeting an older version of the framework.
It's important to understand that you always run the same, installed version of the runtime regardless of the compiler targets. Even when you target .NET 4.0 you are running against the installed runtime of 4.6.2 (or whatever). The idea with this is that you are always using the latest runtime, which - if Microsoft is doing their job right - should always be backwards compatible: Old code should always work on the new runtime. And for the very largest part, Microsoft has upheld that premise.
When you pick a particular runtime, .NET compiles against a version specific set of reference assemblies (see Immo's recent and excellent video on Reference Assemblies for more info) so the compiler knows exactly what's available for the targeted version.
The actual installed runtime that your runtime application binds to is always the same, regardless of whether you run a 4.0 or 4.6.2 application.
The version specific compiler target simply denies you access to the parts of the runtime that the targeted version does not support.
To specify which runtime is used, you compile against a specific .NET Runtime Target as set in the project file, and specify a runtime hint in the form of a configuration setting in your app.config file for when the app starts:
<?xml version="1.0" encoding="utf-8"?><configuration><startup> <supportedRuntime version="v4.0" sku=".NETFramework,Version=v4.6.2"/></startup></configuration>The hint really tells .NET to look for that version and if it doesn't exist throw up the runtime not installed error shown earlier.
The hack here is this: You can change the runtime hint and force .NET to think it's loading a different version than what you compiled against.
Like it or not, for the most part this scheme - although seemingly full of pitfalls - is working out pretty well for .NET.
Fakeout: Compiling against a newer Versions, Specifying an Older One
Ok, back to my DPI Scaling problem. My issue is that I would like to use .NET 4.6.2's new features, but I don't want force a new installation hit for users that don't have .NET 4.6.2 right now. I want my cake and I want it eat it too!
In order to get the new DPI features to work I have to compile my application and target .NET 4.6.2:

But! I can also specify the runtime version to a lower version in my app.config file as shown above. So compile against 4.6.2, but hint for 4.5.2.
Gotcha!

Now when I run my application it is actually compiled against 4.6.2 (ie. the 4.6.2 features are enabled), but the actual loader thinks it's running 4.5.2.
What this means is:
If I have .NET 4.6.2 installed I get all runtime enhancements of 4.6.2. For me this means I get the new DPI Scaling features from 4.6.2 if 4.6.2 is installed on the machine.
If I don't have 4.6.2 installed the app still runs but simply uses whatever features are available on the older version. It just works as long as I don't hit .NET feature API that don't exist in 4.5.2.
In practice this means on my dev machine that has 4.5.2 I see the correct behavior of the application in regards to multi-monitor DPI scaling for the screen capture. On my VM that runs 4.6.1, that same code does not work. And the Win7 VM running 4.5.2 works fine, but the multi-monitor DPI code doesn't work properly there either. The bottom line is that I get exactly what I expect: It works perfect when 4.6.2 is installed, and older versions run without prompting for an .NET Runtime update.
Note, given what I said earlier about running newer version of the runtimes you would think even compiling 4.6.1 should work when 4.6.2 is installed - I tried, but it doesn't work. The new DPI features only work in 4.6.2 so there must be some internal runtime checking happening in the WPF code.
Watch your APIs!
The big caveat with this is that if you reference any new features that are newer than 4.5.2 (what I specify in the app.config), then those features will break at runtime.
Since the DPI features I'm interested in are not accessed from code, but rather are internal to the runtime, things just work when 4.6.2 is installed and fall back to existing 4.5.2 behavior (or whatever version in between is installed) when it's not.
IOW - best of both worlds!
Faking Runtime Versions is a hacky way to have my cake - a widely available runtime without new installs - and eat it - get newer runtime features if available.
Hack Alert!
Using this kind of runtime fakery has some big caveats:
If you accidentally reference APIs that are newer you can cause errors that you may never see yourself while testing, because presumably you're using a recent runtime. Since you're running the newer version all works fine for you, but may not for those running older versions. It may be hard to duplicate those errors because you are not running that older runtime.
Remember any failures then are runtime failures - the compiler thinks I'm building a 4.6.2 application so it won't be any help telling me when I'm using a newer API. You won't see the failure until that code runs and then only on a machine that's running on the older version.
A good way to get the compiler to help in this scenario is to roll back your app to the runtime version you expect to be the lowest you want to run and make sure there aren't any illegal APIs. So in my case I should compile against 4.5.2 just to ensure that I'm not using newer APIs. If Ok then I can switch back to 4.6.2 when ready for the final build.
In reality the deltas between .NET versions is pretty small. I can't think of any post 4.5 features I use in any of my code. For example, there isn't a single thing in Markdown Monster that breaks during compilation between the two targets.
Summary
So, is this something you should do with your application? Definitely not, unless you have a really, really good reason to do so, and you know what you're getting into.
Ultimately the official and best solution is to go ahead install the actual target version that you want to run, which in my case would be 4.6.2. And perhaps that's Ok for your app. Installing a .NET version update isn't the end of the world especially if the percentage of people who need to do so is relatively small.
For Markdown Monster we're seeing less than half of people using .NET 4.6.2 (at least from our error logs), but with 4.6.1 we get closer to 80%. Given that 60% of people running MM for the first time would have to install the .NET runtime if I forced 4.6.2, this is not the experience I want to shoot for. It's hard enough to get people to try out new software in the first place, without scaring them off by having to install another system component for the privilege.
In addition, quite a few people are skiddish about installing new versions of .NET, especially the 4.6 versions which initially had a number of breaking changes/bugs that have since been addressed and have gotten somewhat of a bad rap.
For me and Markdown Monster using this hybrid approach lets me run 4.6.2 where available and lets everybody else get a less perfect experience for the multi-monitor DPI experience, but in return require no upgrade, which is a good compromise for me.
If that feature is important enough to warrant a .NET upgrade, they can do so on their own terms without being forced into it. It's a compromise I can happily live with. As time goes on more people will end up on 4.6.2 (or later) and this problem will fade away.
Just remember: Caveat Emptor, for you and your applications your mileage may vary.
Resources
© Rick Strahl, West Wind Technologies, 2005-2017
↧
New CODE Magazine Article: Getting down to Business with ASP.NET Core
The January/February 2017 issue of Code Magazine has an ASP.NET Core article of mine as the lead cover article:

Yay!
You can check out the magazine when it arrives, or you can take a look online on the CODE Magazine Site to read it there:
Two ways to approach ASP.NET Core
The article is a follow up to my previous Getting to the Core of ASP.NET Core Article article which took a very low level approach to describing how ASP.NET Core works from the ground up using command line tools and working its way up from the very basics to a simple Web application.
This new article takes a different approach and discusses how to build a more typical ASP.NET Core backend to an Angular front end application. The article focuses only on the backend (I'll cover the Angular 2 front end in a later article perhaps) and building a REST based service to provide the data to the Angular 2 front end.
The sample application is a mobile friendly Album Viewer Web application that you can check out here:

Here's what the app looks like in desktop mode:

and here in Mobile mode on a phone:

This CODE magazine article focuses entirely on the ASP.NET back end portion of the application and describes how to set up a new ASP.NET Core project, separate business and Web logic into separate projects. As with the last article the pace is such that I start at the very beginning with the basics and then build up from there. You'll see how to build up an entity model to return your data, deal with Entity Framework 7's different and more limiting features in a business object, and much more. I start with simple query results, go into more complex queries and updates that require more than a simple update. In short - the typical things you run into when you build a real world application. While the sample is fairly simple, it does highlight many real world issues that you run into.
In addition the article also points out a few side issues like ensuring your app can serve proper CORS content so you can test a Javascript front end application that runs on a different domain/port properly and setting very simple authentication without delving into the .NET Identity morass.
At the end I also demonstrate how to switch the database engine - I start with SQL Server and then switch to SqLite - and then move the entire application as is to a Mac and run the ASP.NET server without changes from there.
All in all this article covers a wide swath of features that you are very likely to deal with in even the simplest applications.
Check it out - I hope it'll be interesting and or useful to you in picking up ASP.NET Core.
Read a Magazine!
There aren't many magazines left around with so much online content around, but it sure is nice holding a paper copy in your hand sometimes. I still love the feel of reading an actual paper issue - especially if it has one of my own articles in there :-)
CODE has a special deal going for signing up for a subscription, so check it out
© Rick Strahl, West Wind Technologies, 2005-2017
↧
↧
Adding Files to Visual Studio Projects
When I think of things that annoy me the most in Visual Studio's IDE, the Project New Item... Dialog and how it works has to rank at the top of the list.
Adding new files to a project is a common task and honestly I think much of the criticism leveled at Visual Studio from non Visual Studio developers who first use Visual Studio can be traced back to the convoluted way of adding files to a project.
So, here are a few annoyances and a few tips to make adding new items to a project more bearable.
New Item or New File?
Do you use New File or New Item? And why are these options buried? The File menu only shows New File which is the obvious place to look, but very likely the wrong choice, when you really want the New Item dialog.
By default the New File... dialog which you want to use most of the time, is not mapped to Ctrl-N as you would expect either - no, that obvious shortcut goes to the New File dialog which creates a new file that is not added to the project. Useful in some cases, but generally not applicable when you're working on a project.
The New Item feature is probably the most used context menu action you use at the project level, yet the New Item option is buried in a secondary menu:

The Add... option is buried in the middle of the context menu where it's hard to see (because the text is short), and then the New Item... option is one level down beyond that. If you're mousing there - it's a pain.
To me it seems the New Item... option should be at the very top of the first context menu - not nested - so you don't have to hunt for it. Add... can still be there for all the other options, but that New Item deserves a more prominent location.
You can also find New Item... on the Project menu with Project -> New Item which is a bit easier to discover. But then nobody really looks up there, do they?
Remapping Ctrl-N to the New Item Dialog
Then there are keyboard shortcuts...
As mentioned the default short cut for New Item is not Ctrl-N. I'm not sure because of keyboard remappings that happen mysteriously by various installed extensions, but for me the New Item... option does not have any key association.
The obvious key - Ctrl-N - is mapped to the New File.. dialog, which although similarily named does something completely different. Unlike New Item, the New File dialog opens a new file loose file and doesn't add it to the project. New Item opens a new file and automatically adds it to a project and creates dependent files, adds references etc. that are related to the underlying file template used.
Now I would much prefer Ctrl-N is always mapped to New Item. You can fix that easily enough though in the Visual Studio options:

You just have to make sure that you don't have a key mapping conflict and that nothing else tries to highjack the combo later.
Looks like Visual Studio 2017 defaults Ctrl-N to New Item... as you'd expect.
Use Ctrl-E to jump to Search in the New Item Dialog
Another annoyance is that the New Item Dialog comes up with the tree of high level options selected on the left. You get to pick from the general project types etc. etc. It's nice that that's there, but it's a terrible default.

It would be much nicer if you could just start typing a type name or extension (html, xaml, ts whatever). But as it is is you have to tab over to the search box or even the item selection list first.
Luckily you can easily use the Ctrl-E search shortcut to jump to the search box. Visual Studio recently added the placeholder text into the search box to make that easier to discover, but even so it's easy to miss.
For me, my typical New Item flow is:
- Ctrl-N to open new Item Dialog
- Ctrl-E to Search box
- Type search text like WPF Window
- Tab to list and scroll to item (if necessary)
- Tab to filename and change
- Press Enter to add file
That's a lot of keystrokes just even with shortcuts to add a new file and that's really what counts as an optimized workflow. This is reasonable especially if I need something more complex like a multi-file project item like a WPF form.
It could be easier!
Ideally I would like to see the New Item search box directly above the list and focused by default. The rest of the flow works as well as you'd expect now.
FWIW, the New Item dialog is a lot faster than what it used to be before Visual Studio 2015 and better yet in VS 2017 RC, now it's a matter of streamlining the workflow inside of it to make it more user friendly and more keyboard friendly especially.
Don't forget the 'Quick' Shortcuts
If you've used Visual Studio for a long time, it's easy to get stuck in a rut and not even pay attention to the menus, but there are actually a number of additional, context sensitive shortcut options on the Add shortcut menu:

The menu changes depending on what type of project you are in. The above is for an older WebForms project. The following is for a WPF project and maybe not quite as focused:

These shortcuts don't bypass the New Item template but rather open it with the file type you selected already highlight and so is quite a bit quicker to get a new file into a project.
These shortcuts are also available under the Project top level menu pad, so Alt-P at least gets you quickly to those shortcuts but there's still some keyboarding/mousing to do to select any of them (no shortcut keys) but that's still quicker than using a mouse and the shortcut menu.
Missing file types
Another annoying problem is that in some project contexts, certain file types are not available.
For example, I've been working on a WPF project with Markdown Monster. MM includes a number of addin class library projects that reference and potentially create their own WPF Windows and Controls.
Yet when I'm in the New Item... dialog there are no options to add a new Xaml Window. There are a million other inappropriate options, but XAML Window isn't among them:

Since it's not a single file, but a file with a code behind adding the file manually is quite a pain. The only way that I can effectively do this is to copy an existing window from another project in the same solution and copy it into my project. Then I clear out all the code and rename. That experience really sucks.
All File options should be available to any project type or at the very least to a Class Library project since anything can go into a class library.
While I get that the New Item dialog should be context sensitive to the type of project you're using and a WPF form typically doesn't make sense in a Web project, there should still be an option to show me everything, since I might be doing something non-standard. In Markdown Monster I have addin projects that can add custom windows, and adding new windows in these project is a royal pain in the butt.
Class library projects in particular though can contain just about anything and you should be able to get at all the options.
Keep it context sensitive by default, but at least give me the option of seeing everything via an option box.
Mads Kristensen's New File Extension
As always, if there's a shortcoming in Visual Studio, Mads Kristensen probably has an extension for it. And true to form there is the Add New File Extension which adds the abililty to 'just create a new file':

The extension just lets you type a filename and based on the file name it figures out what template to use and what dependencies to add (which are maintained by the extension, not throught New Item template).
This works great for simple files like C# Classes, JavaScript and TypeScript files, HTML files and number of other single, loose files. It doesn't work quite so well with complex files that are non-Web files. So I can create a Xaml file, and it will create a single empty file, which is not quite so useful as it doesn't hook up the window and code behind (which is painful to do manually).
The addin is also pretty minimal - it mostly creates empty files. So a C# file contains only a using System namespace header for example. You get to create the class. Still in many cases this is actually quicker to type in the missing code than going through the new item template UI and having it spit out a template that you have to then refactor to give it the right name and scope.
The extension is mapped to Shift-F2 by default so you can get there very quickly, type your filename and off you go.
It's a wonderful tool that I use quite frequently especially for C# classes in a project - it's by far the quickest way to get a new class into a project.
Visual Studio 2017 brings some Relief
It's sad that this is needed though - this should be built into Visual Studio, and indeed in Visual Studio 2017 - at least for Web projects.
It works, especially for single files like classes, HTML, JS, TS etc. But for other things the templates are perhaps a bit limited. Typing in a XAML file doesn't create a codebehind file for example (which makes sense since you wouldn't know what type of xaml it is). Still even with this limitation it's a great easy to use addition to Visual Studio. Go get it now if you don't already have it installed and remember Shift-F2.
Resharper's Shortcut Menu
Resharper also has a context menu that makes this a little easier. Press Alt-Insert and you get project context sensitive options to add new files.

This works very fast and well for the base items on this menu like Class, Struct, Interface and Enum. But even though there's a More... option that brings up a dialog with more options, the choices there are rather limited. For example, in a WPF project I only see Resource Dictionary, not User Control, Window, Resources etc. that you would expect.
Summary
Visual Studio and support tools provide a huge variety of ways to create new items in projects, but most are rather key intensive. Visual Studio really is in need of a very quick and keyboard (or single mouseclick of the context menu) centric approach to getting new files into a project. The current New Item dialog which most people use is a dreadful waste of developer time.
If you haven't checked out some of the support tools like Mads' Add New File extension make sure you check it out. Alt-Shift-F2 can become an addictive habit for new file additions even if it works best only with the major file types.
Either way it pays to review your process of how you perform common tasks like adding files to projects to shave off some precious developer seconds wasted on repetitive tasks like adding files to a project.
 this post created with Markdown Monster
© Rick Strahl, West Wind Technologies, 2005-2017
Posted in Visual Studio
↧
Creating a portable and embedded Chocolatey Package

Over the last few weeks I've been getting quite a few requests for a portable Chocolatey install for Markdown Monster. A zip file version of a portable install has been available for some time from the download page, but a Chocolatey package certainly would streamline the process quite a bit more.
So a couple of weeks ago I finally also put out a portable Chocolatey package and in this post I want to describe the process of creating a portable package, both from creating a low impact installation and for creating an embedded Chocolatey package that contains all the raw source files embedded in the chocolatey package.
Chocolatey - Distribution made easy
For those of you that haven't used Chocolatey before: Chocolatey is a package manager that makes it super easy to install and update software on your machine. A single command lets you easily install software and any point check for and install updates.
Once Chocolatey is installed you can install hundreds of common software packages both free and commercial using Chocolatey's silent install process. Note that installing commercial software doesn't remove any licensing requirements - you still have to apply license keys or register as you would have to with full software. Chocolatey simply provides a distribution mechanism for the software.
Regardless, installing and updating software then becomes a single line of command line code:
choco install markdownmonsterand to update to the latest version:
choco upgrade markdownmonsterIt's nice to be able to do this from the command prompt, but even nicer if you need to set up a new machine where you can create a batch file or POSH script to string a bunch of choco install commands together to build up a machine without user interaction.
Creating Packages
You can also create Chocolatey Packages either of your own software or - given permissions - from any software that is out there. Chocolatey makes the process of setting up a new package quite easy with:
choco new markdownmonsterA new project creates a .nuspec meta data file that describes what the package is, and a \tools folder that contains a few Powershell scripts, and a license file. Here's what my full Markdown Monster Chocolatey package folder looks like:
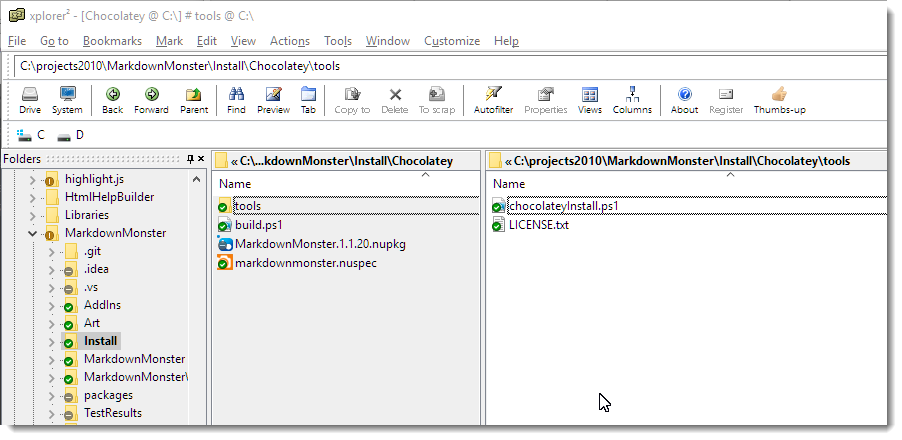
This package downloads a setup.exe file from Github. I publish each version in a special repository and then build a custom chocolateyInstall.ps1 file that contains the latest version's file name, url and SHA256. As you can see - there's not much to this folder structure.
Nuspec Meta Data
The main piece of a package is the .nuspec file which contains the meta data that describes what your package is and where to find out more. .nuspec should look familiar to .NET developers - it's the same .nuspec format that NuGet uses with a few additional enhancements. Under the covers the Chocolatey store runs an extended version of NuGet.
The main piece of a package is the .nuspec file which is what's used to to show users what your package is and does. Here's what the Markdown Monster one looks like:
<?xml version="1.0" encoding="utf-8"?><package xmlns="http://schemas.microsoft.com/packaging/2015/06/nuspec.xsd"><metadata><id>MarkdownMonster</id><version>1.1.20</version><title>Markdown Monster</title><authors>Rick Strahl, West Wind Technologies</authors><owners>West Wind Technologies</owners><licenseUrl>http://markdownmonster.west-wind.com/download.aspx#Licensing</licenseUrl><projectUrl>http://markdownmonster.west-wind.com</projectUrl>    <iconUrl>http://markdownmonster.west-wind.com/images/MarkdownMonster_icon_128.png</iconUrl><requireLicenseAcceptance>true</requireLicenseAcceptance>    <description>Markdown Monster is...</description><summary>Markdown Monster is an easy to use and extensible
    Markdown Editor and Viewer and Weblog Publisher</summary><releaseNotes>https://github.com/RickStrahl/MarkdownMonster/blob/master/Changelog.md</releaseNotes><copyright>West Wind Technologies, 2016-2017</copyright><tags>markdown text editor weblog-publishing weblog blog publishing documentation admin</tags><bugTrackerUrl>https://github.com/rickstrahl/MarkdownMonster/issues</bugTrackerUrl><docsUrl>http://markdownmonster.west-wind.com/docs</docsUrl><mailingListUrl>https://support.west-wind.com</mailingListUrl><packageSourceUrl>https://github.com/rickstrahl/MarkdownMonster</packageSourceUrl>    </metadata><files><file src="tools\**" target="tools" /></files>    </package>
As you can see most of this info is used to display info to the user when you browse the package contents.
All the logic to actually deploy the package is handled via relatively simple Powershell scripts and a number of POSH helper functions that Chocolatey exposes. Specifically you need to build a tools\chocolateyInstall.ps1 script, which choco new creates for you as a template. Creating this file is mainly an excercise in filling in the blanks: Providing a URL, the name of the executable, the type of install and a SHA checksum.
By default choco new assumes you're creating an install for a downloadable installer, which then gets run silently to install the product. The base script very simple, and here is what my full Markdown Monster package script looks like:
$packageName = 'markdownmonster'
$fileType = 'exe'
$url = 'https://github.com/RickStrahl/MarkdownMonsterReleases/raw/master/v1.1/MarkdownMonsterSetup-1.1.20.exe'

$silentArgs = '/SILENT'
$validExitCodes = @(0)


Install-ChocolateyPackage "packageName" "$fileType" "$silentArgs" "$url"  -validExitCodes  $validExitCodes  -checksum "5AA2549D88ED8557BA55D2C3EF0E09C15C526075E8E6083B8C703D0CC2679B3E" -checksumType "sha256"
If you are creating a package for an existing installer this is likely all that you need, but because it is a Ppowershell script you can perform additional tasks here as necessary. If you do things beyond installing an installer package you'll also want to create a tools\chocolateyUninstall.ps1 to undo whatever additional tasks you added.
In the example above my build process generates chocolateyInstall.ps1 this file based on the latest version available in a Releases folder, grabbing the file name and url, and generating the required SHA256 checksum that has to be provided as part of the package installer.
# Script builds a Chocolatey Package and tests it locally
#
#  Assumes: Uses latest release out of Pre-release folder
#           Release has been checked in to GitHub Repo
#   Builds: ChocolateyInstall.ps1 file with download URL and sha256 embedded

cd "$PSScriptRoot"

#$file = "MarkdownMonsterSetup-0.55.exe"
$file = gci "..\..\..\MarkdownMonsterReleases\v1.1" | sort LastWriteTime | select -last 1 | select -ExpandProperty "Name"
write-host $file

$sha = get-filehash -path "..\..\..\MarkdownMonsterReleases\v1.1\$file" -Algorithm SHA256  | select -ExpandProperty "Hash"
write-host $sha

$filetext = @"
`$packageName = 'markdownmonster'
`$fileType = 'exe'
`$url = 'https://github.com/RickStrahl/MarkdownMonsterReleases/raw/master/v1.1/$file'

`$silentArgs = '/SILENT'
`$validExitCodes = @(0)


Install-ChocolateyPackage "`packageName" "`$fileType" "`$silentArgs" "`$url"  -validExitCodes  `$validExitCodes  -checksum "$sha" -checksumType "sha256""@

out-file -filepath .\tools\chocolateyinstall.ps1 -inputobject $filetext

del *.nupkg

# Create .nupkg from .nuspec
choco pack

choco uninstall "MarkdownMonster"

choco install "MarkdownMonster" -fdv  -s ".\"
This build script isn't required of course, but for me this makes it super easy to create a new Chocolatey package whenever I'm ready to push a new version up to Chocolatey. If this script runs without errors I can do:
choco pushand have my package published for review.
If you have installer based software that you are distributing, setting up a new Chocolatey package like this is very quick and easy to do for either some commercial endeavor or even for an internal deployment type situation. This full install gives you a quick idea what a typical Chocolatey package looks like.
To be clear, this is the opposite of a portable install and what the title suggests, but we'll get to that. An embedded install looks quite different - and in fact in the case of the Markdown Monster Portable install there's not even a Powershell script at all as we'll see in a minute.
Portable Chocolatey Installs
Quite a few people have been clamoring for a portable Chocolatey package for Markdown Monster, and so I've been looking into making that possible. A while back I built a portable install in a zip file.
The zip install is just a snap shot of the application that can be copied into a single folder anywhere on your machine. The nice thing about .NET applications is, that for the most part, they are fully self contained and Markdown Monster has all related dependencies in a single folder structure. You can run the application from there as long as the basic pre-requisites have been installed: Windows 10-7 and .NET 4.5.2 or later and Internet Explorer 11.
The zip install is a simple xcopy deploy, but even so installing updates at the torrid pace that MM updates are coming out these days becomes a bit tedious with a zip file that you have to download and then unzip into the proper folder. So no surprise that a number of people have been asking for a portable install Choco package that makes it much easier to update the installation.
Chocolatey makes the process a lot easier by using a single command line command:
choco install markdownmonster.portable.and then:
choco install markdownmonster.portable.to update the portable install.
The difference between a full install and a portable install is that the portable installs are self-contained and install in Chocolatey's private install folder hierarchy rather than Program Files and don't show up in the Installed Programs of the machine. Portable installs also should install without requiring admin privileges so they can be installed on locked down machines.
Personally I think full installs are the way to go given you trust the publisher and you have admin rights to do a full install. There are advantages to full installs - you get all settings that the app is meant to have and an installer listed in Programs and Features. It's often also easier to update if the program offers newer versions which are likely to go through a full installer and not the portable one. There seems little point to give up potentially unavailable features for a portable install if you have the rights and trust a full package.
But for those other use cases where permissions are just not there portable installs can be a good thing to provide.
Portable Installs - not always as easy
It's not quite as quick as you might think to create a portable install. Portable installs should be self-contained which in rough terms means you should be able to xcopy deploy except for some common pre-requisites.
If you're building desktop applications, typically you end up pairing an installer with the application that handles common installation tasks.
In Markdown Monster the full installer handles:
- An optional desktop shortcut
- Registry settings to properly enable the Web Browser control
- File associations (for .md and .markdown files)
- Adds to the user's path
(so you can launch from viamm readme.mdfrom the command line) - Install a custom font (Fontawesome)
- and of course it copies files into the proper system install location (program files)
The full installer for Markdown Monster uses Inno Setup and Inno does all of heavy lifting for these tasks with a few commands. And that's what an Installer should be doing.
Step 1 - Ditch what's not needed
When building a portable install you can probably ditch some things that you normally do in an install. A portable install doesn't need a shortcut usually - users who install a portable install will know where the application lives and either access it via command line or if necessary create a shortcut themselves.
Likewise file you don't have to worry about copying files to a specific location on disk as the install can go anywhere on disk and run. You can put a portable install on a USB stick and it will work.
When installing a portable Chocolatey package, it'll go into c:\ProgramData\Chocolatey\Lib\MarkdownMonster.Portable for example with Chocolatey managing the executable launching automatically via its stub launchers (more on this later).
Portable Friendly Applications
In order to make the portable install work well there were a number of things that had to be handled as part of the application itself rather than letting the installer handle it:
- Installing registry key for IE FEATURE_BROWSER_EMULATION
- Adding to the System path (so you can launch with
mmormarkdownmonster) - Font installation for FontAwesome
- File associations for
.mdand.markdown
It turns out when I looked more closely at what's involved I could reduce a few of these and move them out of the installer and into the application.
Registry Keys
Markdown Monster uses the Web Browser control extensively and in order to work with some of the advanced editors used it requires that it runs the IE 11 engine. By default the Web Browser control runs IE 7 (yup compatibility) but luckily there are registry hacks that let you set up an application to use a specific version of the IE engine.
The IE feature emulation and user path configuration both can be set in the HKEY_CURRENT_USER hive, so the application can actually handle that task. Markdown Monster now checks for those keys and if they don't exist creates them on the fly during app startup.
Here are a couple of helpers to check for values and if they don't exist write them into the registry:
public static void EnsureBrowserEmulationEnabled(string exename = "Markdownmonster.exe")
{

    try
    {
        using (var rk = Registry.CurrentUser.OpenSubKey(@"SOFTWARE\Microsoft\Internet Explorer\Main\FeatureControl\FEATURE_BROWSER_EMULATION", true))
        {
            dynamic value = rk.GetValue(exename);
            if (value == null)
                rk.SetValue(exename, (uint)11001, RegistryValueKind.DWord);
        }
    }
    catch { }
}
public static void EnsureSystemPath()
{
    try
    {
        using (var sk = Registry.CurrentUser.OpenSubKey("Environment", true))
        {
            string mmFolder = Path.Combine(Environment.GetFolderPath(Environment.SpecialFolder.ProgramFiles),"Markdown Monster");
            string path = sk.GetValue("Path").ToString();
            if (!path.Contains(mmFolder))
            {
                var pathList = path.Split(new char[] { ';' }, StringSplitOptions.RemoveEmptyEntries).ToList();
                pathList.Add(mmFolder);
                path = string.Join(";", pathList.Distinct().ToArray());

                sk.SetValue("Path", path);
            }
        }
    }
    catch { }
}
Remember that this works only with keys in HKCU - you're not going to have access to HKLM keys due to the required Admin permissions. After all that's part of the point of a portable install - it runs anywhere even in a locked down environment.
FontAwesome Fonts
The FontAwesome font installation turned out to be unnecessary as I'm using the FontAwesome.WPF library that embeds the font as a WPF resource and provides a number of useful helpers to get the font icons into image and button resources.
I just had to make sure I always use the embedded resource rather than referencing the font directly as I was doing in a few places - oops.
So instead of:
FontFamily="FontAwesome"I have to use the embedded resource instead.
FontFamily="pack://application:,,,/FontAwesome.WPF;component/#FontAwesome"Yeah, that WPF resource syntax is hellatious, but it works to ensure I don't need to have FontAwesome installed system wide.
Removing the font makes the main install less intrusive and reduces the size a little as well.
Unresolved Portable Issue -No File Associations
The only unresolved issue left are the file associations. Markdown Monster registers itself as a handler for .md and .markdown files, which is nice so you can just double click a file in Explorer and open in Markdown Monster or at least see it as an option if you have something else mapped to it already.
It's easy enough to fix by using Open With -> Choose another app in Explorer:
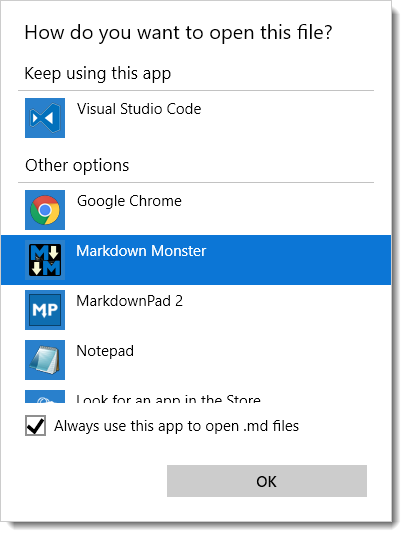
Building a Portable Install - Creating a Distribution Folder
The first step in creating a portable install is to create a distribution folder that holds all of the xcopy-able files.
As part of my deployment pipeline I create a Distribution folder that holds all of the raw, final files for the installation. I use a Powershell script to copy files from various locations, clearing out unneeded files (`CopyFiles.ps1).
Set-ExecutionPolicy Bypass -Scope CurrentUser

$cur="$PSScriptRoot"
$source="$PSScriptRoot\..\MarkdownMonster"
$target="$PSScriptRoot\Distribution"

remove-item -recurse -force ${target}

robocopy ${source}\bin\Release ${target} /MIR

copy ${cur}\mm.exe ${target}\mm.exe

del ${target}\*.vshost.*
del ${target}\*.pdb
del ${target}\*.xml

del ${target}\addins\*.pdb
del ${target}\addins\*.xml

& "C:\Program Files (x86)\Microsoft SDKs\Windows\v7.1A\Bin\signtool.exe" sign /v /n "West Wind Technologies" /sm /s MY /tr "http://timestamp.digicert.com" /td SHA256 /fd SHA256 ".\Distribution\MarkdownMonster.exe"& "C:\Program Files (x86)\Microsoft SDKs\Windows\v7.1A\Bin\signtool.exe" sign /v /n "West Wind Technologies" /sm /s MY /tr "http://timestamp.digicert.com" /td SHA256 /fd SHA256 ".\Distribution\mm.exe"
I also end up signing the two EXEs in the distribution as well as the final Setup EXE for the full distribution.
Portable Installs And Chocolatey
Once you have a distribution folder and you've figured out how to handle the 'configuration' tasks that you may have to shift into your application to make it work properly, you're ready to build a Chocolatey package.
Chocolatey has many options for building packages. Here are some of the common ones:
- Installer packages (exe, msi)
- Zip packages
- Self-contained Packages
Then there are variations where you can embed your installers or binaries directly into the package, or you can download them.
Most common commercial packages and also Markdown Monster's Main Package, download an installer from the Internet and then execute it which is what I showed earlier in the post. This allows for packages that are small and files that can be maintained externally to Chocolatey server. It also allows third parties to create packages of software that they do not own so that more software is available through Chocolatey.
Embedded Binary Packages
You can also create embedded packages where the packages themselves contain the binary installers or even the raw source files. So rather than downloading the installer, the installer can be packaged right into the Chocolatey package. Various Chocolatey Powershell commands can then unpack the installer and install.
The process for these tasks is well documented and usually involves just a few commands.
The advantage of these kinds of installers is that you don't have to keep online versions of your installers as I have to do with my Markdown Monster releases. Currently I have a new release file on the Github MarkdownMonsterReleases repo for each and every version. Using an embedded package you don't have to hang on to anything yourself, but you can push the actual files directly into the package. This relieves you from having to host each and every release for all eternity on a server somewhere.
Chocolately can effectively become your old version software archive.
Embedded Source Packages
Another not so well documented package type is a completely embedded package, which means you ship the raw source files directly in your package's tools folder. This is what I used for the Markdown Monster Portable package and it basically contains all the files in my Distribution folder directly in the package.
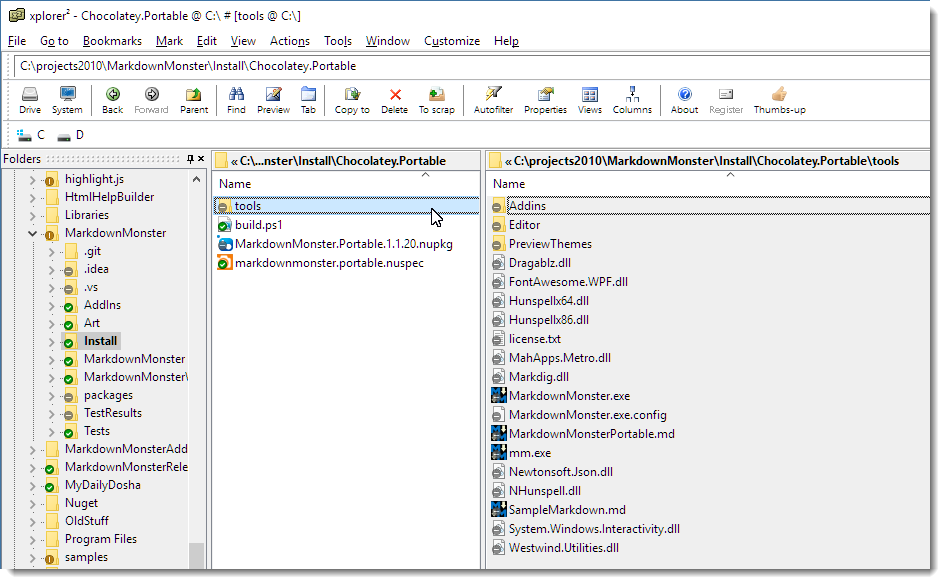
What's nice about this approach is that if you already have an xcopy deployable application, all you have to do is dump all your source files into Chocolatey's \tools folder and create the Chocolatey .nuspec file that describes your package.
If there are no additional configuration tasks, you don't even need to provide a Powershell script file at all because the files are simply copied to the destination folder. In my case there's no POSH script at all.
All that's needed to complete the install then is the .nuspec which is pretty much the same as the one shown earlier save the name and a few tag changes (no admin tag):
<?xml version="1.0" encoding="utf-8"?><package xmlns="http://schemas.microsoft.com/packaging/2015/06/nuspec.xsd"><metadata><id>MarkdownMonster.Portable</id><version>1.1.20</version><title>Markdown Monster Portable Install</title><authors>Rick Strahl, West Wind Technologies</authors><owners>West Wind Technologies</owners><licenseUrl>http://markdownmonster.west-wind.com/download.aspx#Licensing</licenseUrl><projectUrl>http://markdownmonster.west-wind.com</projectUrl> <iconUrl>http://markdownmonster.west-wind.com/images/MarkdownMonster_icon_128.png</iconUrl><requireLicenseAcceptance>true</requireLicenseAcceptance> <description>Markdown Monster is...</description><summary>Markdown Monster is an easy to use and extensible Markdown Editor and viewer and Weblog Publisher</summary><releaseNotes>https://github.com/RickStrahl/MarkdownMonster/blob/master/Changelog.md</releaseNotes><copyright>West Wind Technologies, 2016-2017</copyright><tags>markdown text editor weblog-publishing weblog blog publishing documentation</tags><bugTrackerUrl>https://github.com/rickstrahl/MarkdownMonster/issues</bugTrackerUrl><docsUrl>http://markdownmonster.west-wind.com/docs</docsUrl><mailingListUrl>https://support.west-wind.com</mailingListUrl><packageSourceUrl>https://github.com/rickstrahl/MarkdownMonster</packageSourceUrl> </metadata><files><file src="tools\**" target="tools" /> </files> </package>And you're done!
I use a build.ps1 file to copy the files from my application's release folder to the tools folder, add a license file and then build the package with choco pack and finally test it:
cd "$PSScriptRoot"
$sourceFolder = "..\Distribution"

remove-item ".\tools" -recurse -force

robocopy $sourceFolder .\tools /MIR
copy ..\license.txt .\tools\license.txt

del *.nupkg

# Create .nupkg from .nuspec
choco pack

choco uninstall "MarkdownMonster.Portable"

choco install "MarkdownMonster.Portable" -fdv -y  -s ".\"
This lets me do a local install out of the current folder and I can then test the installation. If that all looks good I can publish with:
choco pushIf you're publishing for the first time on this machine you'll need to apply your api key (which you can find in your Account page on Chocolatey.org):
choco apiKey -k <your api key here> -source https://chocolatey.org/And that's it!
Anytime you submit a package for the first time expect to wait a while for package approval - it can take quite a while. The MM portable package took 2 weeks to get approved, but times can vary depending on the Chocolatey backlog queue. Just don't plan on it showing up the next day.
Overall creating an embedded choco package is among the easiest mechanisms to deploy and for many simple tools and utilities this is probably the preferred way to go even for a primary package. Even for bigger applications like Markdown Monster it makes sense for a secondary portable install which is easy to create assuming the application can self-configure without requiring special admin configuration settings.
Yay for Chocolatey's flexibility to offering you a number of different options for publishing your packages.
Summary
Chocolatey is an awesome tool to install your software. But it's also great as a vendor to have your software delivered easily to users. I'm finding that about 60% of downloads we track come from Chocolatey which is a significant chunk.
Portable installs are more popular than I would have expected as I got a lot of requests for it (although actual install stats so far don't seem to bear that out yet).
Creating a portable install took me a while to sort out, not because of Chocolatey, but just in making sure my app could install and work properly without requiring a full admin install. You have to judge carefully of whether your application can function properly without a full install. But if you can make it work, it's quite surprising how many people prefer a portable install.
If you want to take a closer look at how Markdown Monster handles both the full installer, the full Chocolatey install and the Chocolatey portable install, the installation scripts and Choco packages are part of the source code on Github to check out.
© Rick Strahl, West Wind Technologies, 2005-2017
↧
Empty SoapActions in ASMX Web Services

I still deal with a lot of customers who need to interact with old school SOAP services. Recently I worked with a customer who needed to implement a SOAP Service based on an existing WSDL specification. If at all possible I try to avoid WCF for ‘simple’ SOAP services, as ASMX services are almost always easier to implement, deploy and maintain than the morass that is WCF.
As is often the case with SOAP (and XML/Schemas) getting this service set up to match the behavior of an existing service ran into a few snafus. Namespaces had to be customized and a few types had to be adjusted. That's pretty much standard fare.
‘Empty’ SoapActions? Really?
But another problem and the focus of this post is that several of the SOAP clients that are calling this service where calling this service with empty SOAPAction headers.
SOAPAction: ""Uh - Ok.
While this apparently legal per SOAP spec, it's a pretty pointless thing to do. Also as it turns out, ASMX Web Services do not like the empty soap header.
When you try to call it like this:
Content-Type: text/xml
Connection: Keep-Alive
SOAPAction: ""
Accept: */*<soap:Envelope xmlns:soap="http://schemas.xmlsoap.org/soap/envelope/"
               xmlns:ns2="http://theirdomain.com/theirservice"><soap:Body><ns2:getNextOrder  /></soap:Body></soap:Envelope>
Notice the blank SOAPAction. This then results in this lovely error:
<?xml version="1.0" encoding="utf-8"?><soap:Envelope xmlns:soap="http://schemas.xmlsoap.org/soap/envelope/" xmlns:xsi="http://www.w3.org/2001/XMLSchema-instance" xmlns:xsd="http://www.w3.org/2001/XMLSchema"><soap:Body><soap:Fault><faultcode>soap:Client</faultcode><faultstring>System.Web.Services.Protocols.SoapException: Server did not recognize the value of HTTP Header SOAPAction: .
at System.Web.Services.Protocols.Soap11ServerProtocolHelper.RouteRequest()
at System.Web.Services.Protocols.SoapServerProtocol.RouteRequest(SoapServerMessage message)
at System.Web.Services.Protocols.SoapServerProtocol.Initialize()
at System.Web.Services.Protocols.ServerProtocolFactory.Create(Type type, HttpContext context, HttpRequest request, HttpResponse response, Boolean& abortProcessing)</faultstring><detail /></soap:Fault></soap:Body></soap:Envelope>System.Web.Services.Protocols.SoapException: Server did not recognize the value of HTTP Header SOAPAction: .
What's the problem?
If you take a closer look at the expected inputs for the service methods from the ASMX test pages you can see that SOAP 1.1 expects a SOAPAction with the method name specified:
SOAP 1.1
POST /pinnacleApi/PinnacleOrderService.asmx HTTP/1.1
Host: localhost
Content-Type: text/xml; charset=utf-8
Content-Length: length
SOAPAction: "getNextOrder"<?xml version="1.0" encoding="utf-8"?><soap:Envelope xmlns:xsi="http://www.w3.org/2001/XMLSchema-instance" xmlns:xsd="http://www.w3.org/2001/XMLSchema" xmlns:soap="http://schemas.xmlsoap.org/soap/envelope/"><soap:Body><getNextOrder xmlns="http://order.ejb3.session.server.p2.actual_systems.com/" /></soap:Body></soap:Envelope>
SOAP 1.2 on the other hand does not require a soap header:
POST /pinnacleApi/PinnacleOrderService.asmx HTTP/1.1
Host: localhost
Content-Type: application/soap+xml; charset=utf-8
Content-Length: length<?xml version="1.0" encoding="utf-8"?><soap12:Envelope xmlns:xsi="http://www.w3.org/2001/XMLSchema-instance" xmlns:xsd="http://www.w3.org/2001/XMLSchema" xmlns:soap12="http://www.w3.org/2003/05/soap-envelope"><soap12:Body><getNextOrder xmlns="http://order.ejb3.session.server.p2.actual_systems.com/" /></soap12:Body>
and figures out the service action based on the element name inside of the SOAP body - getNextOrder in this case.
For this customer the request is actually running as a SOAP 1.2 request but the included SOAPAction makes the ASMX engine think that the request is coming in as a SOAP 1.2 request. ASMX gets confused and hence the error message.
How to fix this?
Luckily there's an easy solution to this problem which involves stripping off the SOAP header if it is ‘empty’. And by empty I mean blank or as in the case of this particular client "".
The ‘official’ way to manage request and response manipulation in ASMX services involves creating a SoapExtension, which involves creating an extension which then has to look at the incoming request stream and rewrite it.
But there's actually a much easier solution by falling back to System.Web features. Since ASMX Services run in the ASP.NET System.Web pipeline we can actually manipulate the incoming ASP.NET request directly and simply do this:
- Make sure there's a Global.asax file in your project
- Add a Application_BeginRequest method like this:
void Application_BeginRequest(object sender, EventArgs e)
{
    var soapAction = Request.Headers["SOAPAction"];

    if (string.IsNullOrEmpty(soapAction) || soapAction == "\"\"")
        Request.Headers.Remove("SOAPAction");
}
Summary
Clearly this is a special use case that doesn't happen very often, but when it comes to Soap clients doing weird stuff that's not unheard of. Nobody seems to ever do SOAP the same way.
I like running ASMX services rather than WCF because there's a lot of things you can tweak more easily with ASMX services and this is a good example. I reserve usage of WCF for WS* services and there WCF's complexity is actually warranted for the tweaking of request/response messages. If this was WCF I'd have to look into message parsers and a hierarchy of classes to implement just to make a simple change in the request pipeline. Here I can simply change a header using the standard ASP.NET features.
Now if we could only say goodbye to SOAP altogether for good, life would be a lot easier 😃
© Rick Strahl, West Wind Technologies, 2005-2017
Posted in ASP.NET Web Services
↧


